This year I'm very glad that I'm able to join Global Game Jam again. Here's the game that our team have developed. o lukin e ko jaki (Watching Poop)!

In this game, there're poops sliding and jumping around on the street. The player has to first memorize the path taken and the color of the poops. Then, the player would be asked a question about the poops. If the player answers correctly, a new wave of poops would come out. Otherwise the player'd lose the game.
The game is in Toki Pona using Sitelen Pona writing system.
Here's the gameplay video. What a shitty game it is, literally! :D
This game was developed in collaboration with jan N30HRTGDV and jan Niko. I'd like to thank them for forming a team with me. This game wouldn't have happened without their help. :)
Due to COVID19, GGJ's going remote this year. I've thought about taking this opportunity of remote GGJ to join another jam site. However, on second thought, I decided not to do that.
For the ease of administration, our team had decided to just join the Hong Kong Cyberport's site. That's because they're flexible and I'm rather experienced with joining this site.
All of our team members are Toki Pona speakers. Before the jam, I've managed to reach out four Toki Pona speakers interested in joining the jam. In the end only three of us ended up working on the game tho.
Originally we planned to exclusively speak Toki Pona within the team during the event. Unfortunately, one of the team members can't speak the language fluently. Therefore, we ended up switching to English by the end of the event.
However, as for the game itself, its description, and even the code of the game, they're in Toki Pona.
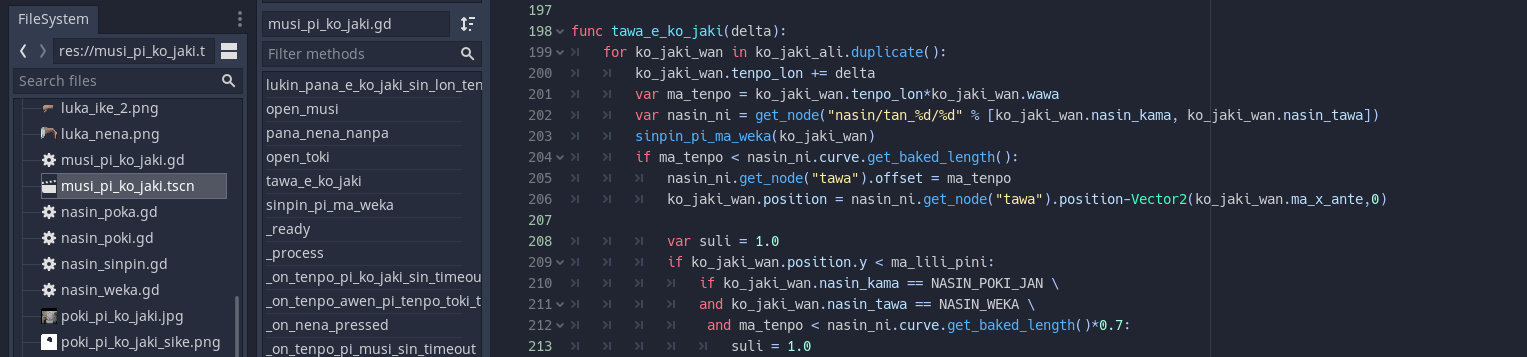
I'm rather impressed that I was actually able to write code entirely using this minimalist language (except for API calls and keywords of the programming language).
Since all of our members have at least a little bit experience on using Godot Engine, we've decided to use this engine. The person who's the most familiar with this engine was jan Niko. Due to some circumstances tho, I ended up being the main programmer of the team. Fortunately I've briefly revisited Godot Engine before the start of the event. And I'm surprised that my Godot skill was actually good enough for making a game for the jam. In fact, despite my limited experience, I found that I'm more efficient with Godot than with other game engines like libgdx that I've spent months on using.
With Godot engine, I've managed to pull out the following game feature in a short time, which would take quite a bit of time to do without it:
It's my first time doing any of the things above for a game. I'd seriously consider using Godot Engine for future game jams. It's easy to use, I could get the work done real fast. It's simply awesome for cranking out game features within a limited amount of time.
jan Niko had helped a bit with programming. Originally they planned to make music for the game. However, due to lack of inspiration, it didn't happen. But that's ok. It isn't like that this game requires any music.
jan N30HRTGDV had helped with designing 3D models. Originally we planned to make the entire landscape in 3D. However, after he finished the design, we agreed that the landscape wasn't good enough, and we didn't have time to fix that. Therefore, we ended up extracting a couple of models from the landscape and put them onto the original photo. Here's the photo before having the 3D models and after having them. Funny how there's a statue there having a bowl ready to hold the poops. xD

As shown above, I've added shadow to the models so that it'd fit into the photo more naturally.
I've also asked for a thumb down photo from each of our team members. Each of us had taken a photo of thumb down. They're used in the scene when the player lose the game.
I'm very glad to have collaborated with all of the team members. The jam is more fun when I'm accompanied. And I'd like to congratulate jan N30HRTGDV for having completed his first game jam! :)
Here's the list of the stuffs that I've done for the first time in my life during this project:
Here's my fuck-up during the jam: In the trailer, I've used the wrong audio filters for noise removal. It made my voice indecipherable. And I didn't add any subtitles to it. And the alien-looking writing system shown on the game wasn't helping at all. :(
I think that the fellow jammers probably wouldn't know what this game's all about just by watching the trailer. I should have used some better filters so that my voice would be more clear. If not, I should have added subtitles.
I guess I should keep this in mind if I ever join Global Game Jam on Cyberport's site again.
I was pretty much occupied with the jam and making this blogpost. After this, I hope that I'd have more time to continue on my musical training.
Hey guys! I'm glad to announce that Sadale is finally resuming normal operation. Sadale had previously entered limited operation mode due to the wordings in the employment agreement that I've signed with my ex-employer. With my new day job, I'm very glad that I'm able to, once again, work on personal projects again.
Despite that Sadale was in limited operation mode, I've managed to pull of the following during accomplishments:
Currently, the following projects are planned:
Last year was a combo-breaker of my Global Game Jam participation due to the limited operation mode. This year I'm very glad that I'm able to join the event again! :D
This year I plan to do something different. I'll be joining with fellow Toki Pona speakers. For those who didn't know, Toki Pona is a minimalist constructed language with less than 130 words. Many wordings are ambiguous that the listener has to figure stuffs out by context. At first we thought about communicating with team members exclusively in Toki Pona. But some of the team members seems not to be able to speak the language well. So I'm not sure if it'd be a good idea.
Let's see how it'd turn out. Maybe we'd end up developing a game that has Toki Pona language inside. Maybe it'd be fun to make the game. Wait for the end of the event and we can tell.
One of the major problem of how I compose music as of today is that it heavily relies on trial and error. I do understand the theory/math of the plugin that I use. However, I've no idea on how they sound like. I just tinker with the knobs until it sounds right.
In addition, I'd like to learn efficient mean of transcribing existing music pieces so that I could reverse engineer them. Then I can make my own with similar style of the reference work.
Here's my plan in regards of music training that aims to improve my music composition and audio engineering skill:
In the past months, I've been using GNU Solfege for ear training. It worked well until I got stuck at harmoinic progression. Then I decided to take a step back and used another tool for training my skill on identifying the base note of a chord. What I've found was that I often miss the note by a semitone. So I thought that it might be a good idea to do microtonal melodic interval identification first. Maybe that'd ultimately help with chord progression identification.
As for timbre identification training, I believe that I'd have to use some kind of specialized tool for that as GNU Solfege doesn't support that. Maybe I could find one online. Or maybe I could develop an LV2 host that'd train me to identify sound produced by a synthesizer with random parameters.
It's going to take a while for me to complete this training. Hopefully I'd become a better music composer after this. Then I'll try composing music with my newly learned musical knowledge. Maybe I could create instrument template for making music as well.
I'd like to perform an experiment of developing two different product using the same PCB. That's mainly because, based on the experience of ilo nanpa, the units of production of my projects would be very small. Maybe the demand would be like 10~20 units. However, when I'm ordering the PCB, I'd have to order at least 5~10 pieces of them at once. Having multiple designs on the same PCB would allow me to dynamically allocate the same batch of physical PCB for multiple projects. This would allow me to have less unutilized PCB stored in my home.
I've come up with a preliminary schematics and I've tried sourcing the components for the projects. The only component that I couldn't source so far is the USB-capable microcontroller. I was told by multiple sellers that that particular model of microcontroller would take months to restock. So I guess I have to pick another one and redesign the schematics.
This device is just like LED name badge. Except that it has 7-segment LEDs on it instead of LED matrix. Here's the planned feature:
With this project, hopefully I can learn working with USB, which could be useful for the ilo musi project (the portable game console) if I wish to implement USB feature for that.
This device is just a LED clock with internet time sync mechanism. Apparently the auto-synchronized clocks are rather expensive in the market and it isn't worth my money to purchase them. So I'd like to develop my own one. Here's the planned feature:
With this project, I should be able to learn designing mechanical case, which'd be useful for designing the mechanical case of ilo musi project in the future.
This was the main project that got suspended during limited operation mode. It's the portable game console project that I've spend a year working on. From now on I'm able to work on this project again. After working on all of the aforementioned projects, I'd like to make a better version of ilo musi. The following features are currently planned:
Hopefully all these projects would lead Sadale to a wondrous future. It'd take Sadale a step closer to the dream of becoming "a cyber entity capable for creating literally anything possible using computers".
Happy late April Fool! It's that time of the year again. International Asynchronous Rock Paper Scissors Tournament 2020
This year we've managed to invite quite a few new supporting organizations. Of which a few of them are the serious ones, like the ones that's registered in real life or software that have significant influence in the internet. We're very glad to have them supporting our event this year. These supporting organizations include:
It makes the logo count of the participation certificate of this year 15! That's more than we ever had in the past years!
So you wanna have this certificate? Tsk tsk! Too bad! This event had ended and you can't join anymore. You have to wait for next year. :P
This year we've got 158 participants. I ranked 150th with a score of -160. That's my worst performing year. :(
Oh. At least I've got this awesome participation certificate that you don't get to have! :P
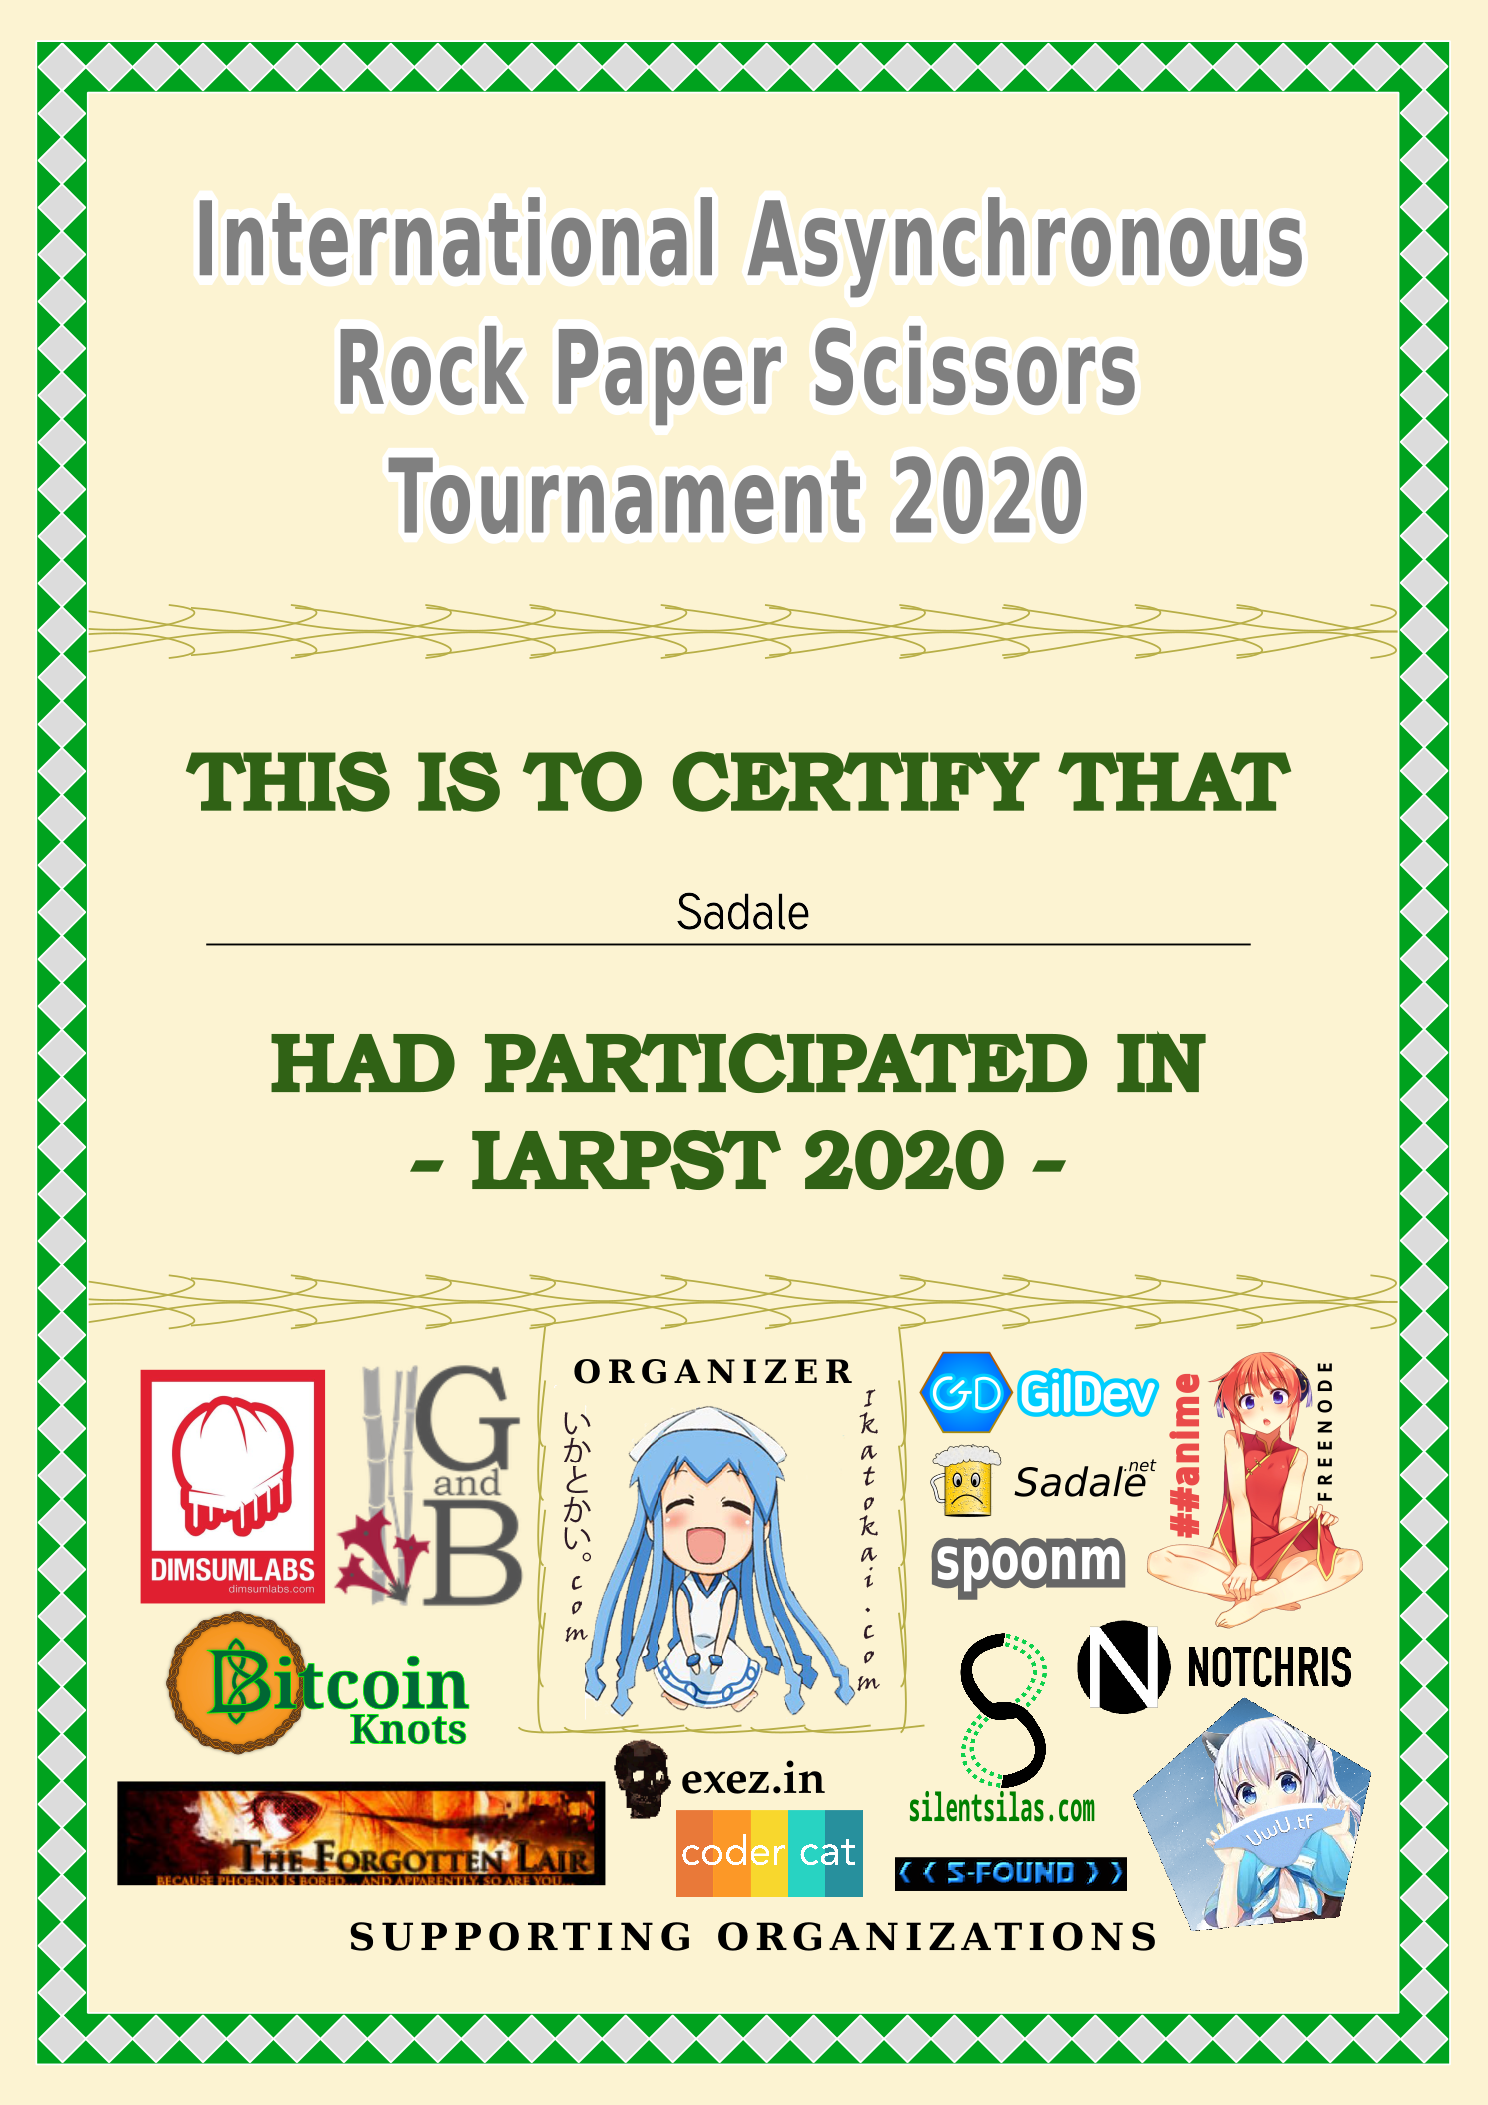
It makes me feel weird to have a participation certificate that has my own logo on it. Anyway, I hope that I'd have better luck next year. I'm gonna get the gold then! :P
Maker Faire Shenzhen 2019 had ended. It was my first exhibition in my life. This blogpost is to document what I've done during the trip for the exhibition.
It took me weeks to prepare for the event. I had to sort out the application, paperwork, etc. In addition, I had to decide which projects to be exhibited, plan for the layout of the props in the exhibition, purchasing props for exhibition, order posters, order my cards, come up a list of the equipment to be brought to the site, plan for when to go and when to leave, etc. etc. etc. I had gotten extremely busy since the day that my application of exhibition had been confirmed. :(
The preparation was a loooot of work. I barely made it on time. The organizer had provided the dimensions of the exhibition table. And here's my test exhibition setup at home with a platform made of two tables that's about the same size as the exhibition table:
I had decided to dedicate a day after the event for sightseeing. However, since I'd be exhibiting alone, touring around alone would be boring.
Luckily there's a WeChat group for oversea exhibitors. I just shouted there like an idiot and ask if anyone's planning to tour around in Shenzhen a day after the event. It turned out that there's a Japanese team interested in accompanying me. Yay! :D
We ended up having a plan for the tour in both the registration day (i.e. the day before the first day of the exhibition) and the day after the end of exhibition.
I took highspeed train from West Kowloon Station in Hong Kong SAR to Shenzhen North Station. The border control process went smoothly. And I had never traveled using the highspeed rail station in Hong Kong.
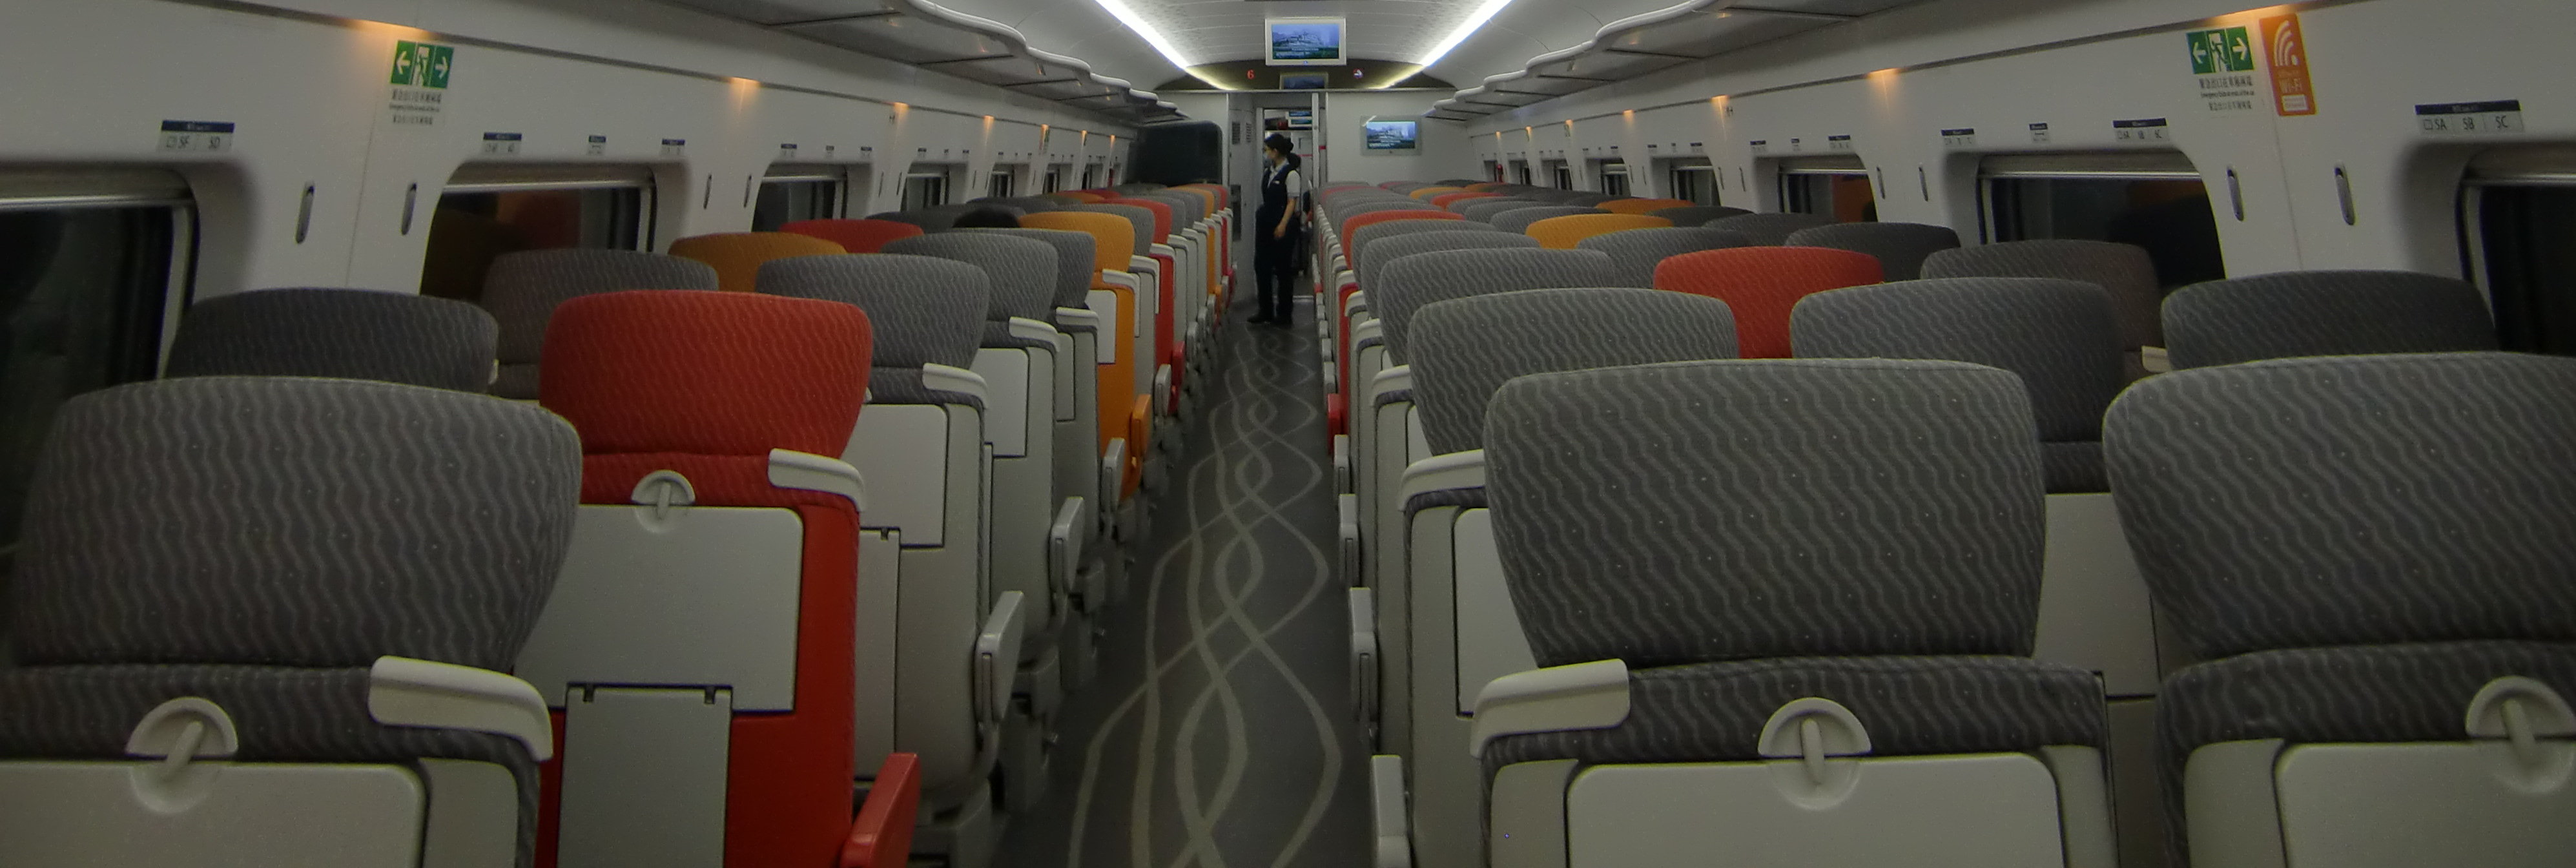
When I saw the Vibrant Express train that I was about the board on, I was excited. Despite that it's pretty much identical as other CRH380A trains in functionality, the paintings are different. And it's operated by MTR Corporation (a company in HKSAR) instead of the companies in mainland China. It's like a special snowflake.
The interior of the train didn't disappoint me either. There're TVs showcasing Hong Kong and its tourist destinations. There was only a few people traveling using the train I was in. It took a while until the train got departed tho.
However, the real disappointment started when the train got departed. As soon as the train left the station, it ended up being in a tunnel. And it's staying inside the tunnel for the entire trip. Here's a photo showing the view inside the train with nothing other than darkness outside the windows:
Its traveling speed for the entire trip was less than 200 km/h. This isn't what I was expecting for "highspeed" train. Nevertheless, it only took 20 minutes to went from West Kowloon to Shenzhen North. That's an impressively short traveling time, except that it didn't take the train waiting time into account. Depending on your origin and destination, the highspeed train may, or may not be any faster than using other kind of transit.
After having lunch close to the station, I headed to the hotel by taking metro. As I can't speak Mandarin well, it took me a bit trouble to get thru the check-in process. After that, I walked to the exhibition venue and did the registration of exhibition. Here's the entrance of the event's site:

I was allowed to perform the setup of the exhibition booth and store the exhibition props into the warehouse. However, I decided not to do that because I'd rather to do the setup right before the exhibition starts. Since I had tested the setup at home, there's no reason that the same setup wouldn't work on the site.
As there's a bit time left for the day, I gathered with the previously contacted Japanese team and toured around in Shenzhen with them. We've visited the following places:
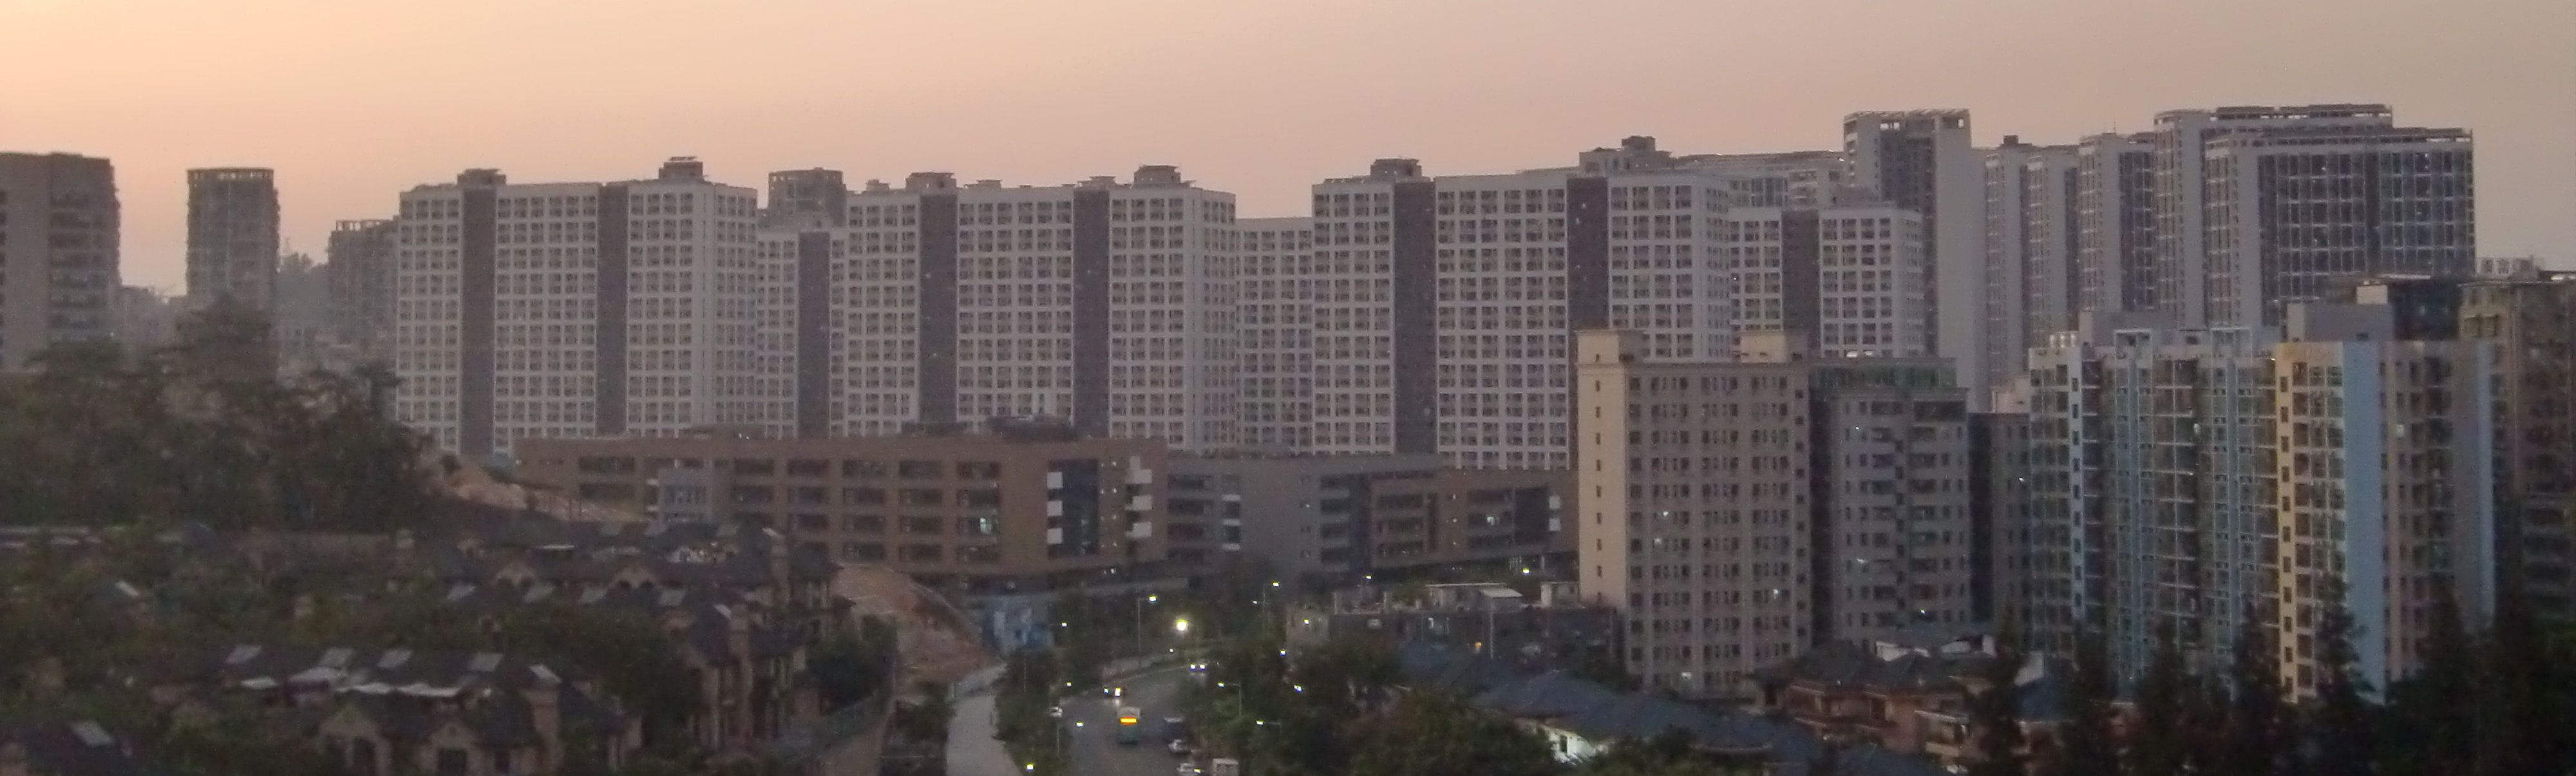
The music park that we visited is just a park with music playing inside the entire park area. The speakers were somehow synchronized. The decoration inside the park wasn't particularly interesting. However, the view outside the park was. Here's an array of buildings outside of the park that each buildings look identical:
As for Huaqiangbei, most stores were closed by the time we arrived there because we were a bit late. Fortunately the Japanese team had managed to get what they wanted. And I've got a power adapter, a retractable USB cable and an earphone. They're of good value. :)
I was a bit surprised that most storekeepers there in Huaqiangbei couldn't speak English well. A while ago I've been to a building in Huaqiangbei that most people there could speak decent English. This led me to thought that most storekeepers in Huaqiangbei could speak English well.
After that, we got drink in a cafe. And I parted with the Japanese team, went back to hotel, took a shower and slept.
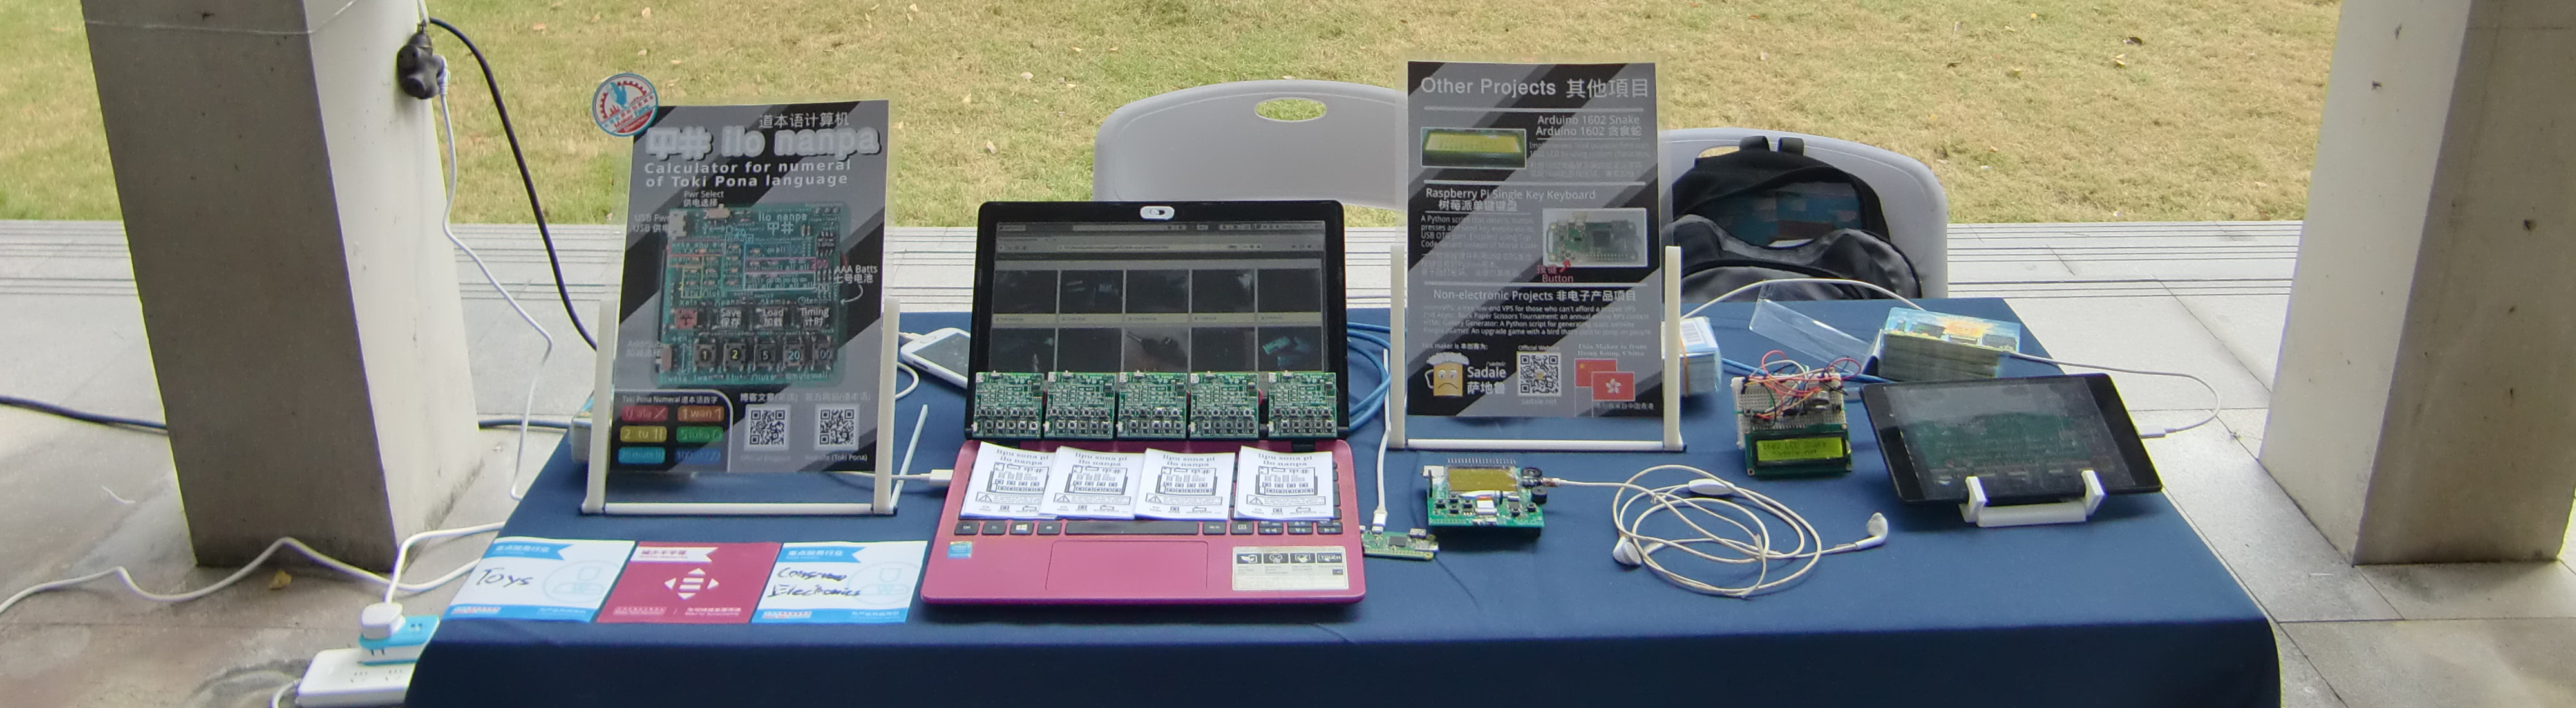
I went to the Exhibition's site about an hour early so that I could do the setup. The setup went mostly smoothly. The only issue was that I wasn't able to get the power because there's only one power socket shared between me and the booth next to me. This was quickly sorted out by contacting the organizers, which provided me a socket outlet splitter. Here's my exhibition setup:
Some of the visitors spoke English, some spoke Mandarin and a few of them were able to speak Cantonese, which's my mother tongue. It wasn't easy for me to identify which languages the visitors spoke. And I often judged that wrong. For example, many Chinese-looking visitors of my booth are actually Japanese or Korean. And a few Chinese visitors actually spoke Cantonese instead of Mandarin.
As my Mandarin was bad, quite a few of those Mandarin speaking visitors had mistaken me as Japanese. When this happened, I just pointed at the flag of China with the flag of Hong Kong SAR on the poster and explained to them that I'm from Hong Kong, China.
I actually find that it's easier for me to explain my projects in English than in Mandarin. That's probably because English is the main language I use for anything technical. I did have a problem on trying to figure out the correct technical words in Chinese (Mandarin) when I tried to explain the stuffs that I was exhibiting. Oh, of course, it's the easiest for me to explain them in Cantonese mixed with some English technical words. :P
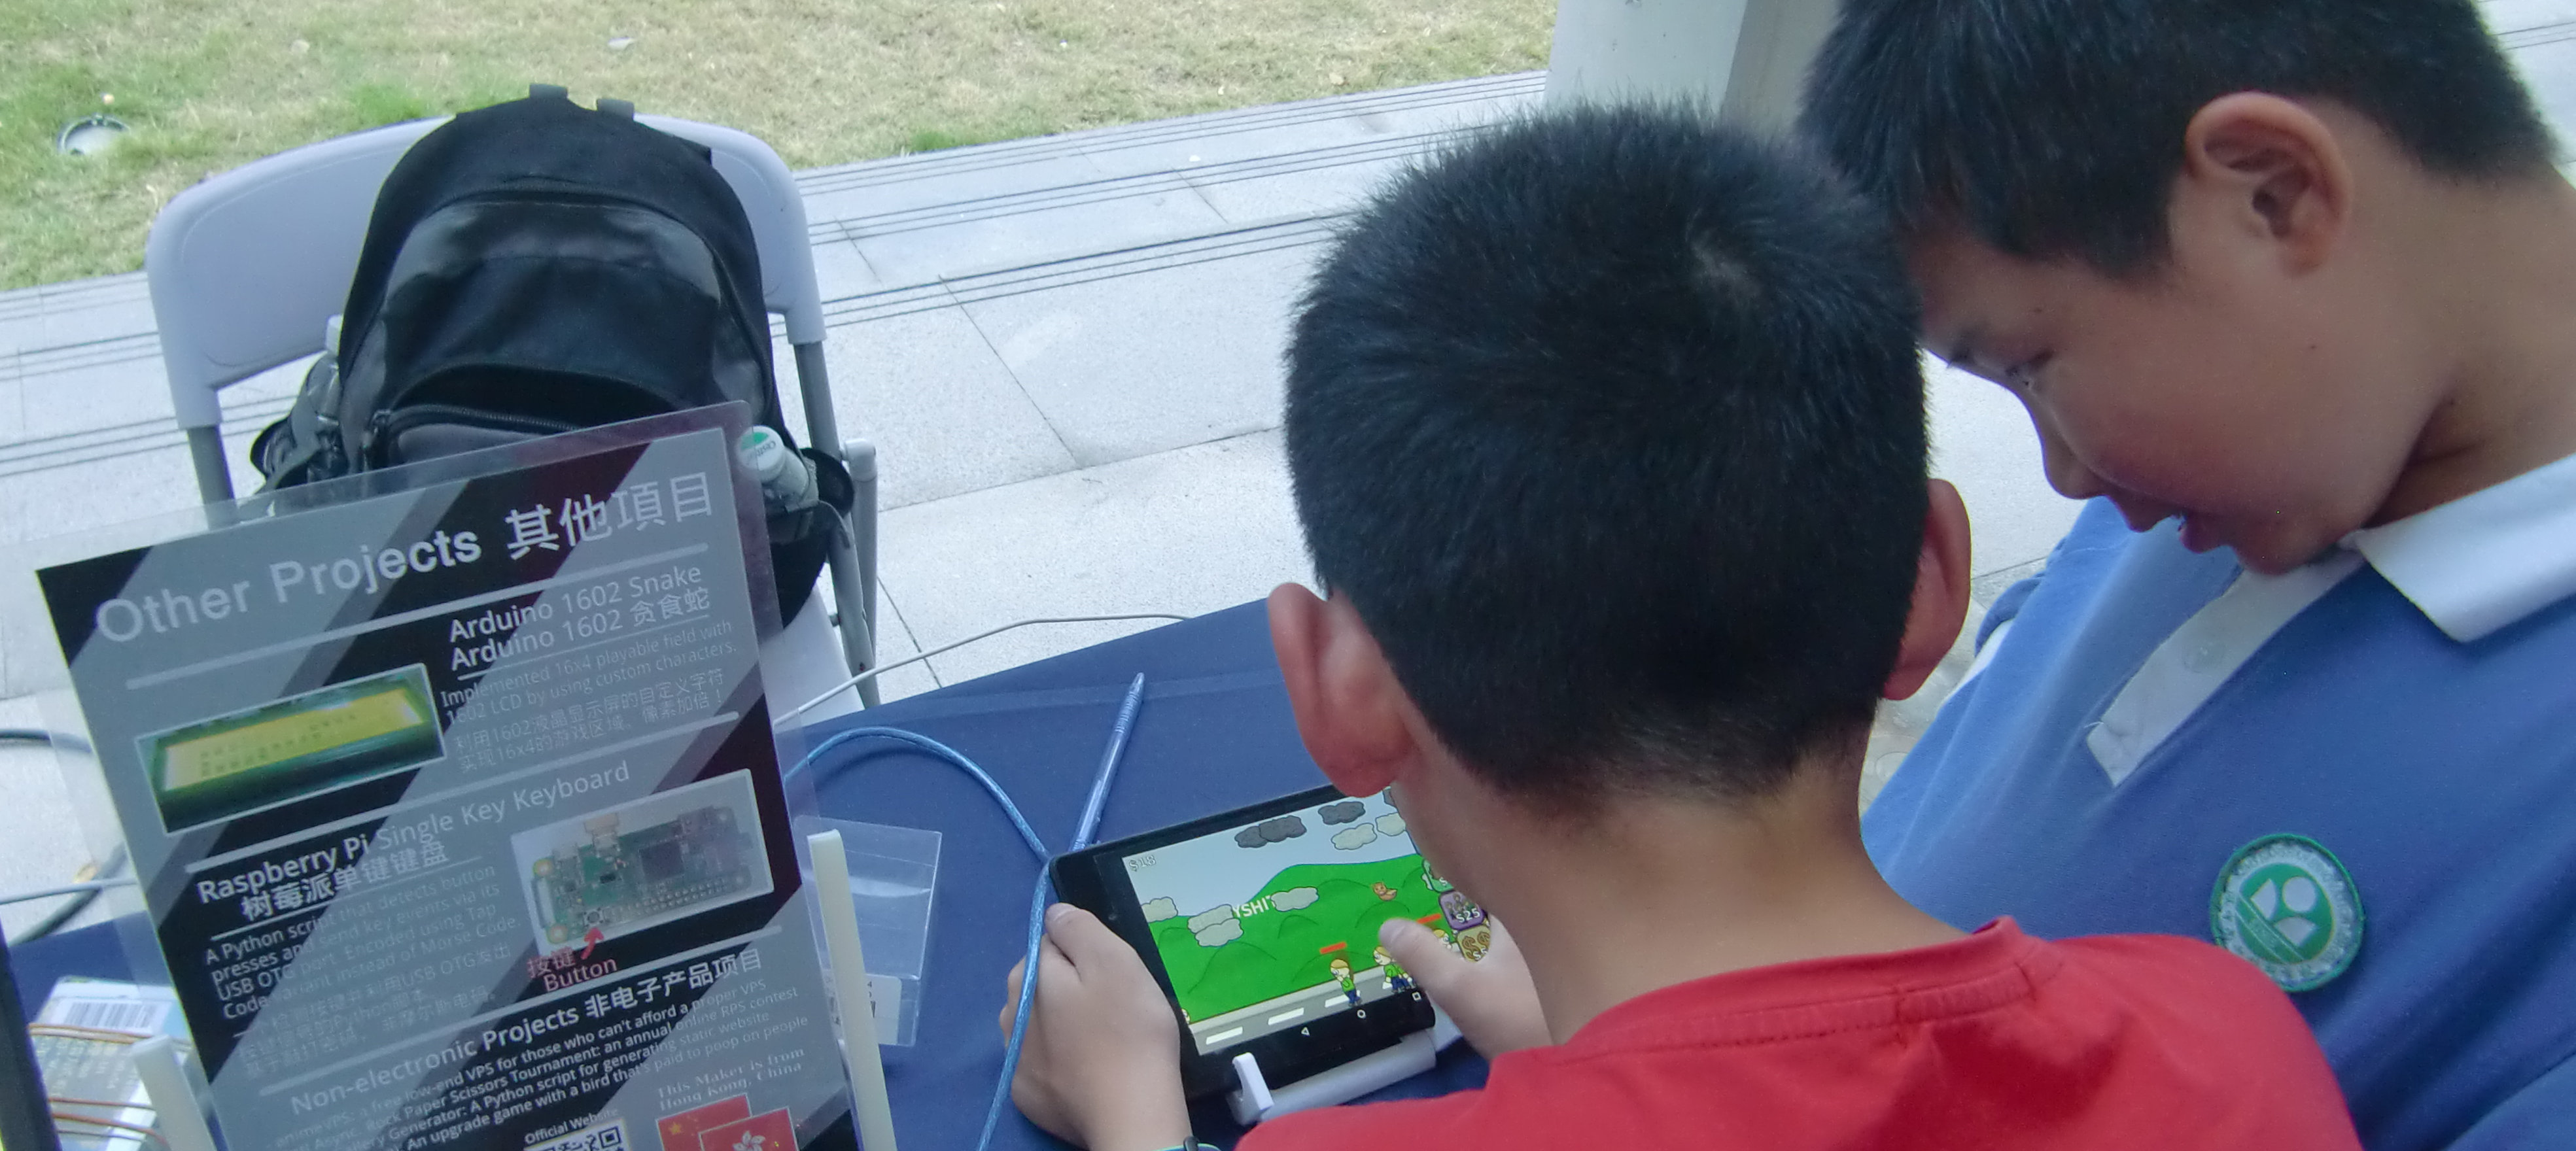
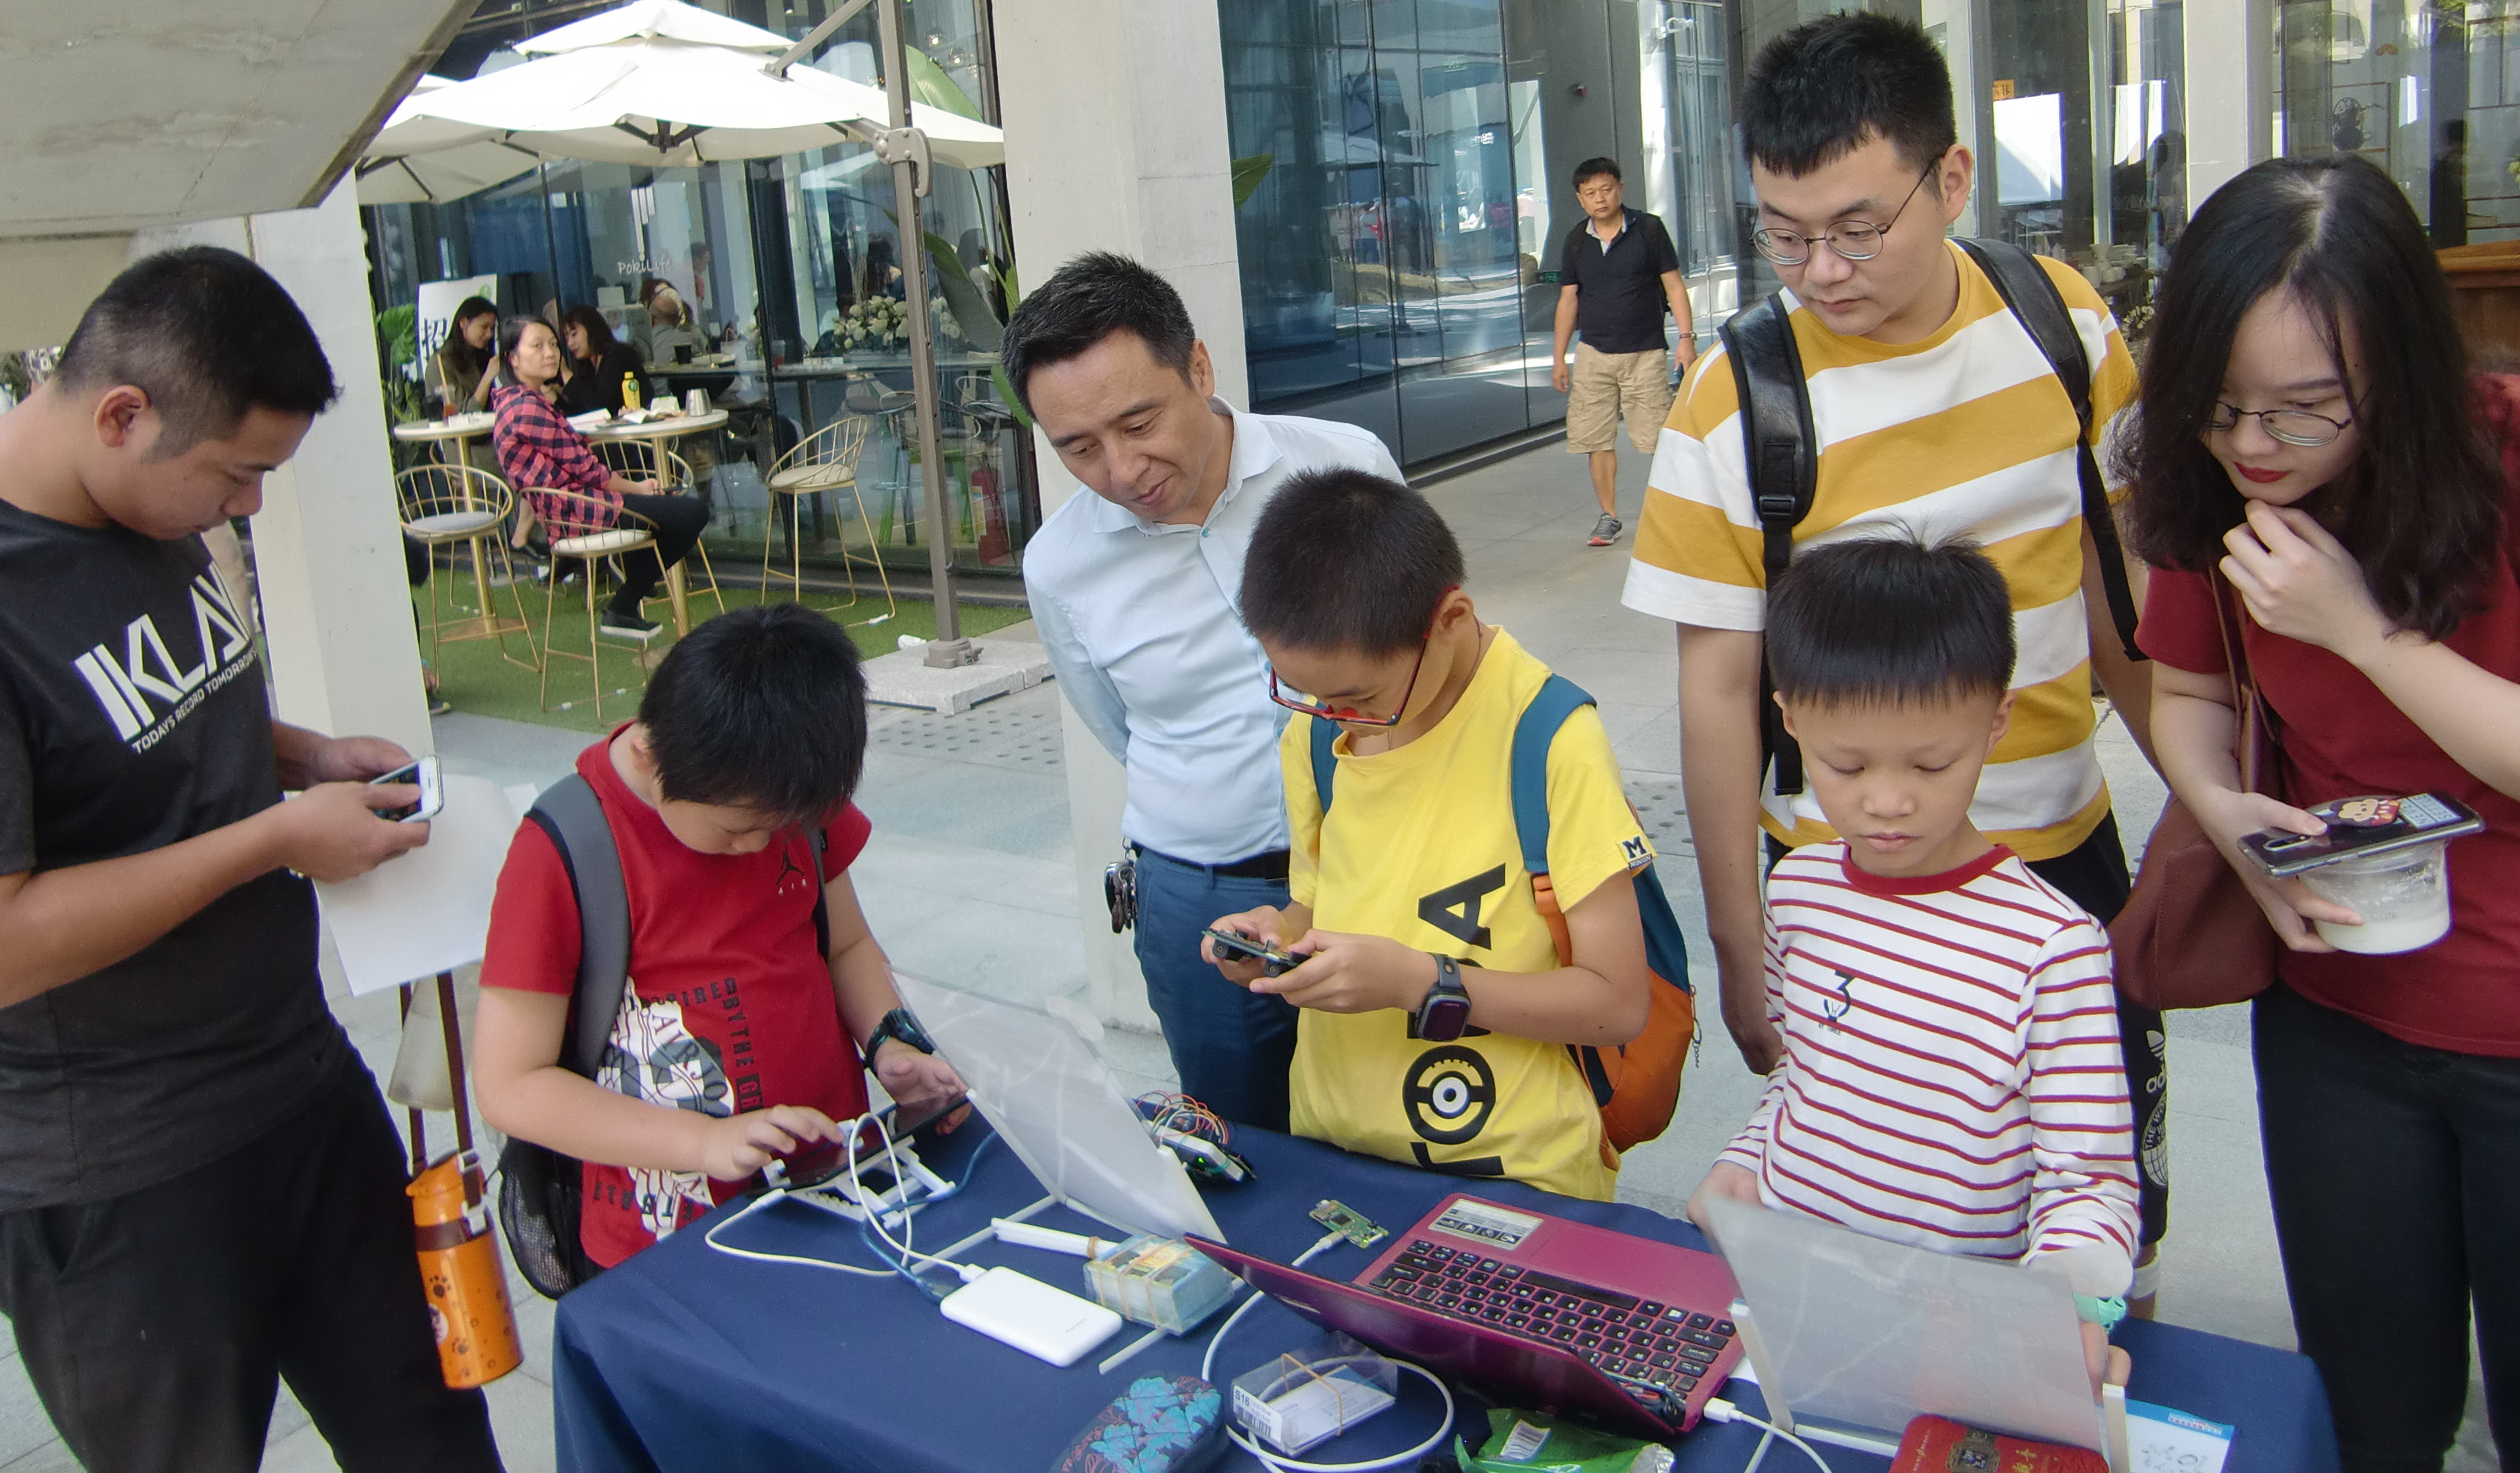
As for the exhibition itself, it seemed to me that the kids loved the poopie game that I was exhibiting. There was a few times that the kids gathering around on the tablet that's having my poopie game running on it:
It's rather exhausting to do the exhibition alone. There's no break. I had to handle all of the visitors alone. I had compressed cracker (military ration) for lunch so that I wouldn't need to leave my booth. I only asked the staffs to take over the booth for going to toilet and fetching drinking water. Other than that I pretty much stayed in the booth during the event. It was a super busy day. :(
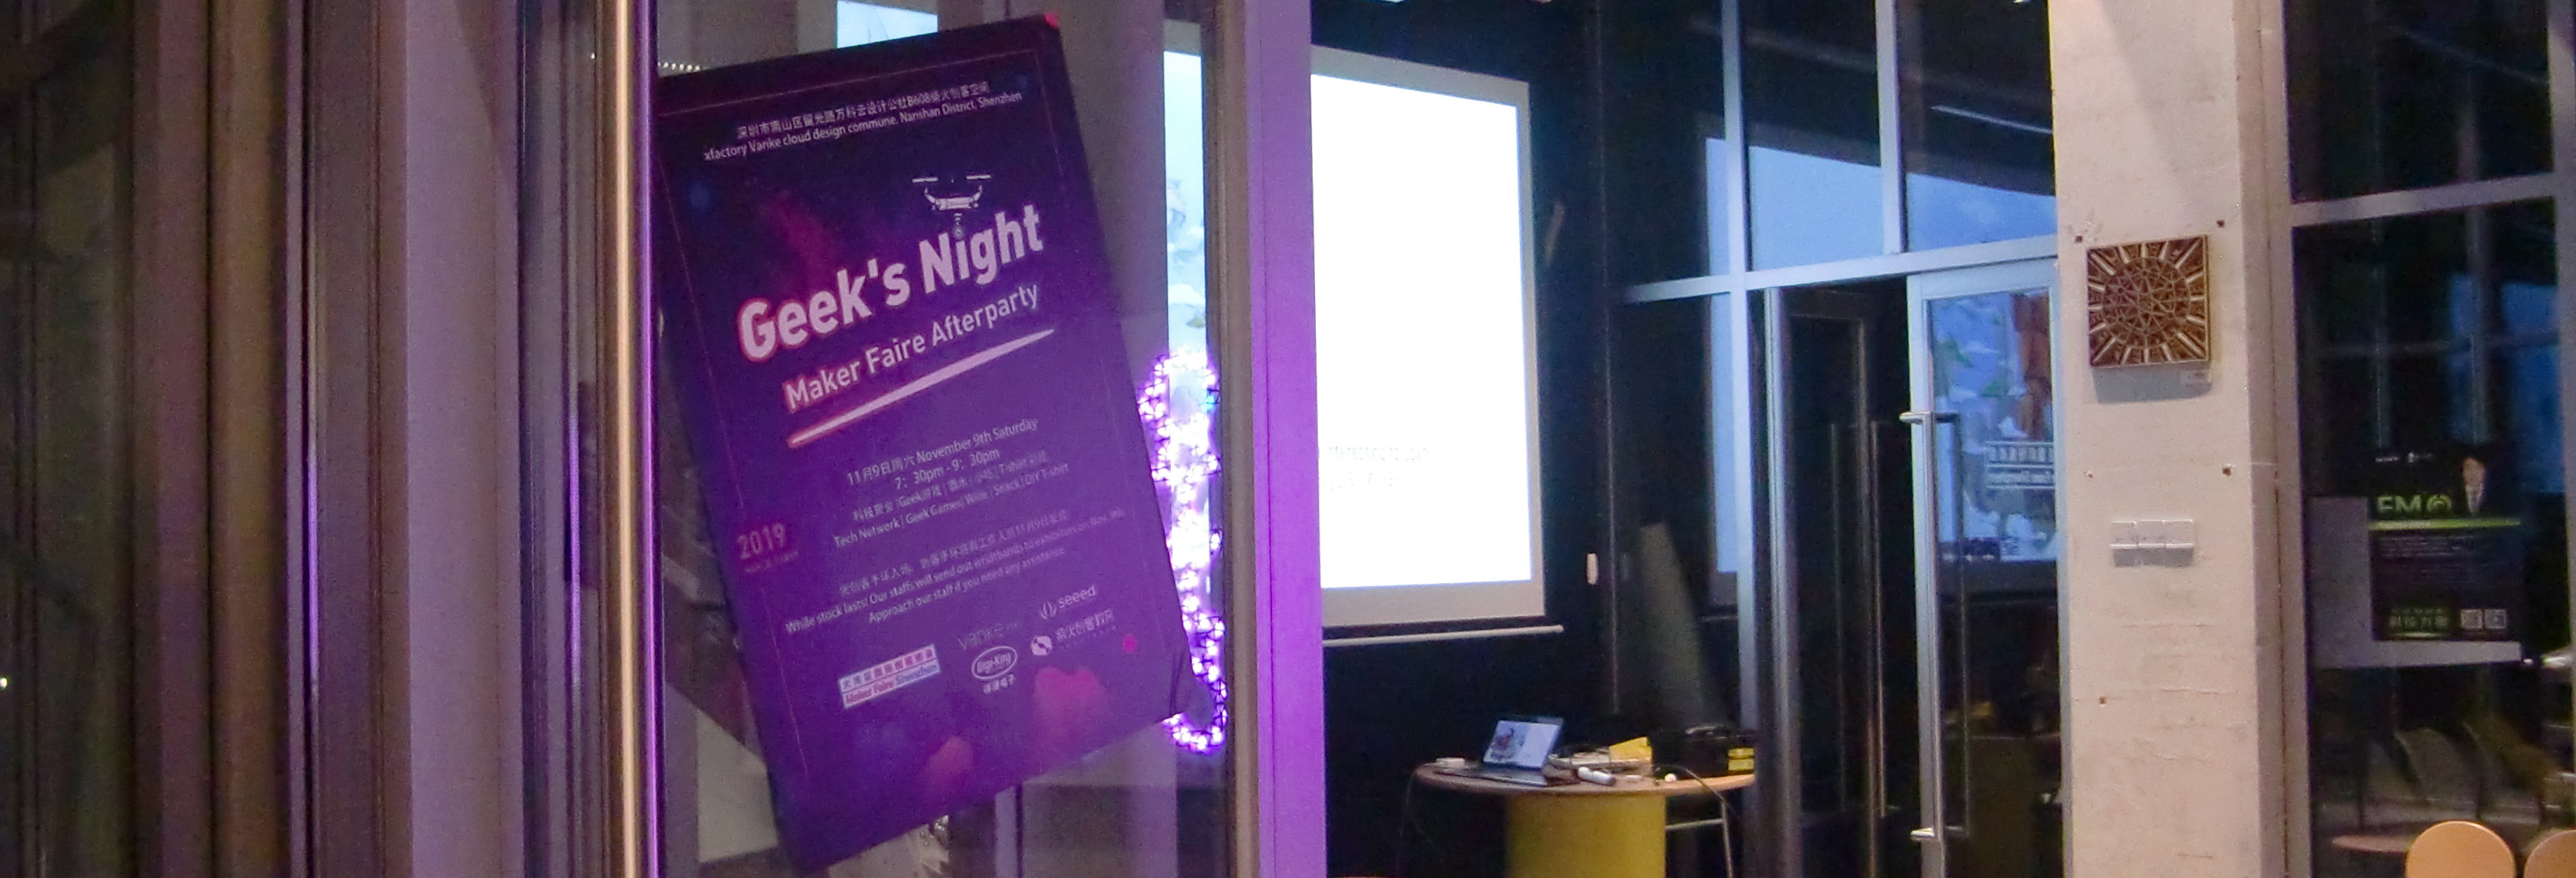
I joined the Maker Party after the first day of the event. It's just a normal party. It had pizza, packaged waffles, lollipop, crackers, beer and water. I wish they had non-alcoholic soft drinks tho. Here's the photo of the entrance to the party:
Since I already had dinner, I took a lollipop and that's all I had during the party. The party was mostly about socializing with other makers. So I chatted with the people inside the party.
This session reminded me of the pitching session of my first global game jam. Fortunately, I'm doing far better on this one because I'm now a less jerky person than I used to be. This party was pretty fun. I got a chance to know more about other fellow makers and learned about what they had developed and what they're making for. :)
Here's something funny happened during the party. There was a Super Mario cosplay guy in the Maker Faire. He was exhibiting just two booths away from mine. I found him in the party and tried chatting with him, only to find out that he's Japanese and he could only speak bad English and bad Mandarin. We chatted with each others mostly using simple English. With the help of photo and body language, we were still able to communicate. And we managed showed our projects to each others.
Suddenly another Japanese joined in. Thank goodness. He spoke good English albeit heavy accent. I could understand him perfectly. So he acted as a translator between the Mario guy and me. This was cool until another Japanese joined in. Then they started discussing in Japanese and started speaking less English. After that, yet another Japanese joined in and the entire conversation had turned into Japanese-only. I was like, awww. :(
Then we exchanged our cards and I moved on to chat with someone else. At least I had got the twitter of that Mario guy. xD
After the party, I got back to hotel, took a shower and slept a bit late.
It's pretty much the same as the first day. Except that there're more visitors to my booth. And I hadn't slept enough in the previous night. It was almost too much for me to handle the visitors alone. :( Here's a photo showing an overwhelming amount of visitors:
During the lunch time, I opened up another pack of compressed cracker (military ration), just like the previous day. However, there were too many visitors. It was very tough to handle the visitors while eating the crackers. It took me like 1.5 hours to finish the two crackers inside the pack because I had to stop eating multiple times for explaining my projects to my visitors. At the end of the lunch, my voice turned very bad and my throat was extremely dry. Despite that I drank a lot of water, it didn't help much. :(
The event was going to end in an hour. I was extremely tired and I needed to sleep pretty badly. There was less visitors by that time. But still, it was pretty tough to me.
After the exhibition had ended, I dismantled the booth and headed to the place of taking group photos. Here's how my booth looked like after getting dismantled:
After the event, I went to hotel and took a nap immediately. After napping for a few hours, I got out and had dinner. I felt much better after having the dinner. Then I headed back to hotel, took a shower and slept. That's the end of the day.
I had reserved this entire day for touring around in Shenzhen. The trip of this day was planned by the Japanese team that I've contacted. I took my baggage, checked-out from the hotel and gathered with the team. Here're the places that we went to:
For the anime mall, we arrived there too early. Almost all stores weren't opened. We still looked around there anyway. I've purchased an el cheapo tiny Vocaloid figure for RMB20 from an opened store, and I'm extremely disappointed. The coloring of the hair of the figure's far off.
As for the food court, it's a pretty fun one. One of the stall sold grilled insect, which I didn't dare to try. We just randomly grabbed some food there and shared with each others. Most of the food there were spicy and mala (numbing-spicy). :)
After that, we headed to high tech park. Here's a photo of an artpiece showing the bird-eye view of high tech park inside a shopping mall that we visited:
In the Xiaomi store, one of the Japanese team members purchased a new phone right on the site. Other members had purchased something else, like speaker and stuffs. I envy them. All I had got in the store was a fidget toy that costed me RMB10. I'm a poor man. :(
We didn't do much in the Huawei store because it's more expensive than the Xiaomi one.
In the cafe, each of us just grabbed a drink and we tried out the new stuffs that we've just purchased. I assembled the fidget toy. A Japanese team member had tried out the Xiaomi speaker that she had just bought and played some random music. We had fun. :)
In the evening, we went to a bar, had drinks, chicken pieces and taco and we parted.
Right before getting back to the home, I decided to check the local news in Hong Kong about the traffic. It was pretty scary. Large scale protests were happening in 11th Nov 2019 in Hong Kong, blocking the traffic and stuffs. After discussing with my family, I decided to try returning to my home anyway. If I failed, I'd get back to Huanggang and book a hotel room to stay there.
I went to Huanggang Checkpoint using metro. Then I took a cross-border bus to get back to my home. After alighting from the bus, I took a detour to avoid the police station because it's where the chaos often happen. I passed thru a road with bricks all over on it. Apparently the bricks were used for blocking the traffic and was put there by the protestors. Nevertheless, it's not that dangerous because there's no fighting between groups of people having different political ideology. In the end I managed to get back to home safely.
Goodbye Shenzhen! I'll come back again some days later! :)
The entire Maker Faire experience was pretty awesome. It was quite fun overall, including the preparation work, exhibition and the post-exhibition sightseeing. I've also made a few new friends there. :)
However, it took me a loooot of work to join the exhibition. Weeks of work had been done solely for the preparation. And the exhibition itself was extremely exhausting. It's far more exhausting than joining Global Game Jam. I'm not sure if that's because the event itself's exhausting, or the event's held outside my home town, or the combination of both. Fortunately I've taken good care of myself and ensure that I've got enough sleep and food. Despite that I've caught cold, it's still nowhere as bad as the cold spell that I've caught in my first Global Game Jam.
After the event, my mana bar has almost gone empty. I pretty much need a break. Since it's exhausting, I'm not sure if I'll be doing another exhibition next year. I guess it'd be easier if I had partner(s) for exhibition. (Oh well! As if I'd be able to get one! I only socialize with online friends that aren't in Hong Kong) Anyway, in the near future, I'll probably be laid-back for a bit and focus on watching anime and playing video games. :)
Big news! Sadale'll be exhibiting in Maker Faire Shenzhen 2019 in booth E10. It'll be my first time starting a booth for doing exhibition in my life! :)
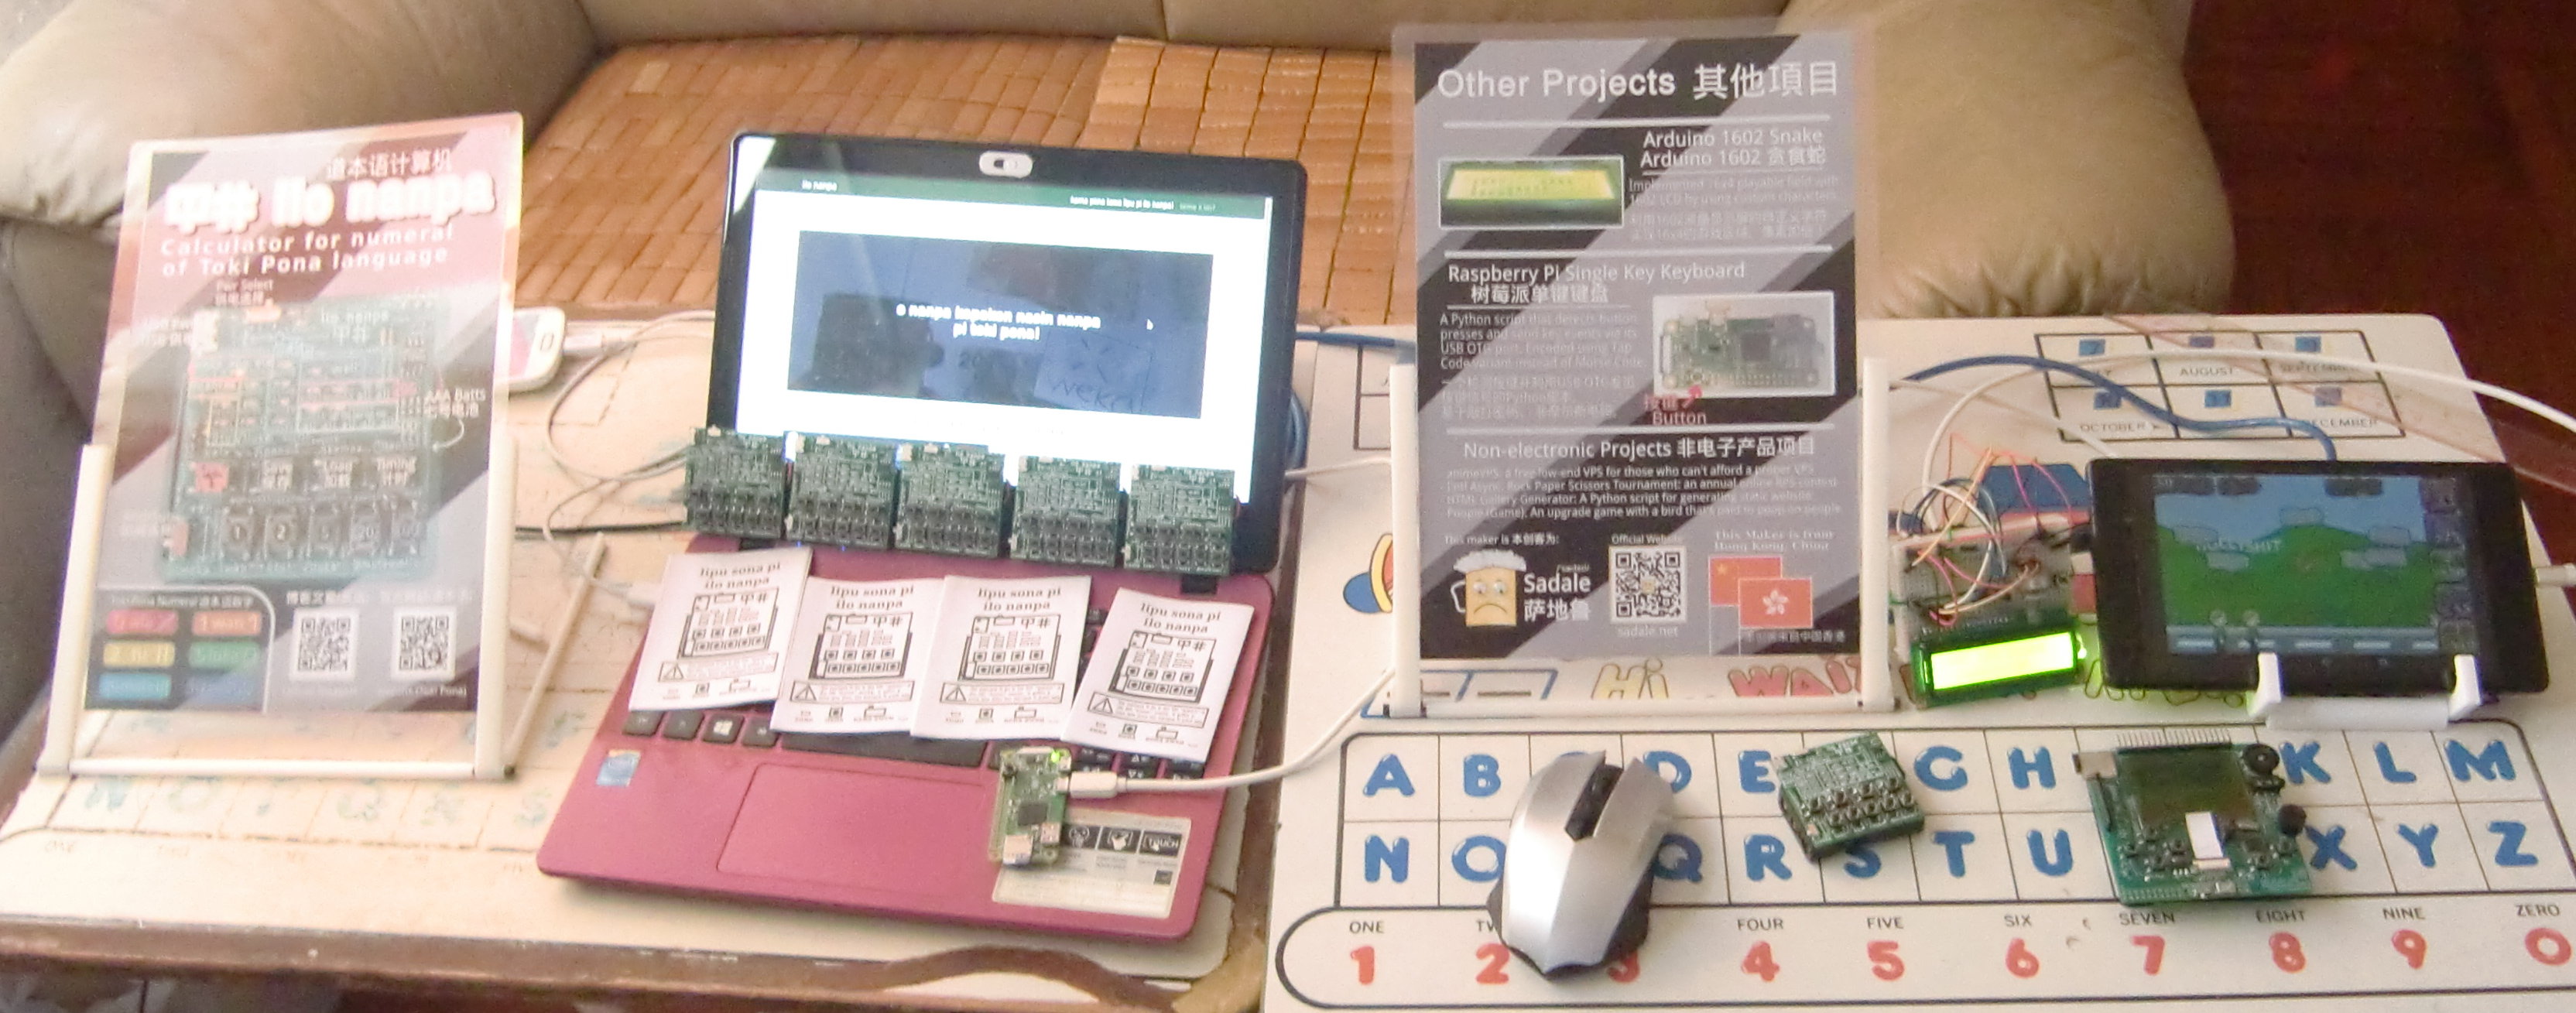
ilo nanpa will be the main project to be exhibited. That's because it's the most successful project of Sadale. It's also my only project that had entered "mass" production stage (well, it's actually home-based "mass" production with the quantity of produced units of 40ish). I'll be introducing toki pona numeral, toki pona language and ilo nanpa device to the visitors of my booth during the event.
In addition of that, I'll probably be also showcasing some of my smaller projects, including Arduino 1602 Snake (Gaming Device), Raspberry Pi Single Key Keyboard, the Poopie game and HTML gallery generator during the exhibition.
All visitors'll be welcomed to try out the projects that I'll be exhibiting. :)
I've planned for doing an exhibition more than a year ago. That's why I had checked out Maker Faire Hong Kong 2018 to see what exactly'd be going on in Maker Faire.
Well, that was pretty much I had expected. There's exhibition and seminars and workshops. Except that the exhibition were meh. Honestly, I was quite disappointed by the exhibition of Maker Faire in Hong Kong last year.
Almost all of the exhibitors were from education institutes. Some of them were schools, while some other of them were cram schools. Despite that there're a few impressive projects among them, almost all of them were lame, dumb, meh and unimpressive. Those projects just involved using very limited technical skill. As for cram schools, they're just joining the faire for marketing their classes for kids.
Another common type of exhibitors were those who make education materials. Developing education material isn't bad per se. However, no one's going to use them for anything professional. No one ever! And what those education material doing is to raise a bunch of half-ass engineers. Same goes for cram schools. And I was hoping that I'd be able to find more exhibitors that's actually technically competent for developing something serious.
I think I'd only found like 5 non-education makers out of like 100 booths. Well, I guess learning solely from classes is a culture of Hong Kong, which's an idea that I don't quite buy into because I've become what I'm now mainly by self-learning using online resources. And the problem with those classes is that it won't take the kids far enough to be able to do everything they want to do. And that's how some, if not all of those education institutes make money. They keep teasing the kids so that they'd apply for more and more classes. :(
Despite being lame, I still planned to join Maker Faire Hong Kong this year as an exhibitor. Mainly because it'd be the most convenient to me. To my surprise, it's apparent that there'd not be any Maker Faire in Hong Kong this year. I've contacted the organizer earlier this year without any response at all. And their website is still displaying the info of the 2018's event as of the time of writing.
Since there's no Maker Faire in Hong Kong, and I still intend to do exhibition this year, I've decided to exhibit in a Maker Faire that's close to Hong Kong. The Shenzhen one is the closest one. Therefore, I decided to join the one in Shenzhen.
As a bonus, exhibition is free for individual and non-commercial team exhibitors. It's so nice of the organizer to offer booths to us for free! I'd like to thank the organizer and sponsors of the event. :)
By joining this exhibition, I'll be doing these things for the first time in my life ever!
I'm so hyped up! Can't wait to join the event! See you in booth E10 of Maker Faire Shenzhen 2019! :D