This year, I've developed the game E. M. Wave Jammer. It is the world's first telephone game in Global Game Jam, which is playable by dialing a telephone number.
I FUBAR'd in last year's game jam. Fortunately, I did much better this year.
This game is for entertainment only, no political message intended.
For Hong Kong SAR phone numbers, dial 54839953. For non-Hong Kong SAR phone numbers, dial +85254839953 with skype. We do not accept international non-skype calls to save our operational cost. This game has Cantonese(Press 1), Mandarin(Press 2) and English(Press 3) version. Please notice that this phone number is temporary. It will be changed after I've finished setting up my phonesite.
The game happens in Japan during Cold War era. In the game, North Korea is using advance electromagnetic waves technology for sending signals to Cuba. They are plotting to attack Japan. In the game, the player plays as the role of the commander of telecommunication department. The player is responsible for jamming the signals between them.
For the ease of command, Japan is divided into 6 zones. The electromagnetic waves from North Korea will propagate via zone 1, zone 2, zone 3, zone 4, zone 5, zone 6, all the way to Cuba.
The player is required to use limited amount of electricity to build jammers. Electricity are consumed for building the jammers. No electricity is required to operate the jammers. The more electricity you spend to build a jammer, the more powerful it is. For example, a 5W jammer can attenuate the signal by 5W.
The remaining non-attenuated signal will become military information end up on enemy's hand. When the information level reaches 100%, you lose. The information level is increased by the Wattage of signal received divided by the Wattage of signal sent. There is no way to reduce the information level.
The player starts with 20W of electricity. To generate electricity, generators have to be built. They generate electricity when signal pass thru its zone. For example, a 5W generator will cost 5W to build, and generates 5W of electricity.
Each zone can only have one structure(e.g jammer, generator). New structure building on a zone with existing structure will demolish the existing one. Structures cannot be sold.
After wave 6, there will be Accelerated E.M. Wave signal. It is able to bypass Zone 2, 4, 6. It is sent via Zone 1, 3, 5 to Cuba.
After wave 11, there will be Narrow-band E.M. Wave signal, which includes low frequency E.M. Wave Signal and high frequency E.M. Wave Signal. Ordinary jammers are half as effective against these signal compared with other signals. Therefore, the player is able to build LF Jammers and HF Jammers to defend against these signals. A 10W LF Jammer can attenuate LF Signal by 20W, Ordinary Signal by 5W, and cannot attenuate HF signal. A 10W HF Jammer can attenuate HF Signal by 20W, Ordinary Signal by 5W, and cannot attenuate LF signal.
After wave 16, there will be E.M. Wave from Cuba to North Korea, which propagates via Zone 6, 5, 4, 3, 2, 1 to North Korea. Accelerated E.M. Wave from Cuba propagates via Zone 6, 4, 2 to North Korea.
After wave 21, there will be FM Signal. FM Signals is immune to Ordinary Jammers. It makes non-LF, non-HF FM waves very troublesome to be dealt with because they couldn't be attenuated by ordinary jammers. Yet, HF and LF jammers are only half as efficient to deal with non-LF, non-HF waves.
Before the Jam, I've developed the hardware Dinbo Prototype B as well as its library libdinbo. I've also made a template for developing any telephone system based on this library.
In addition of the telephone system, I have also practiced using LMMS, Labchrip, Audacity, SoX, just all of the software that I planned to use. I also planned to practice Aegisub for making video subtitles. Unfortunately, I didn't have enough time and the Jam day had come. :(
Just like the last year, the 48 hours game jam spanned across three days.
In the first day, I've arrived at the venue, before the event started, I've found a bug on the library of Dinbo Prototype B that made it failed to detect DTMF touch keys properly. Fortunately, I fixed it right before it started.
After that, I've listened to the briefing. After the theme Waves was announced, I came up with this game design quickly. Since I was working solo in this jam, this process went way quicker than the jam of previous year. :)
Here is a photo of my game design document. As you see below, it is only one A4 page. It is poorly-organized because I'm the only intended audience of this document. :P
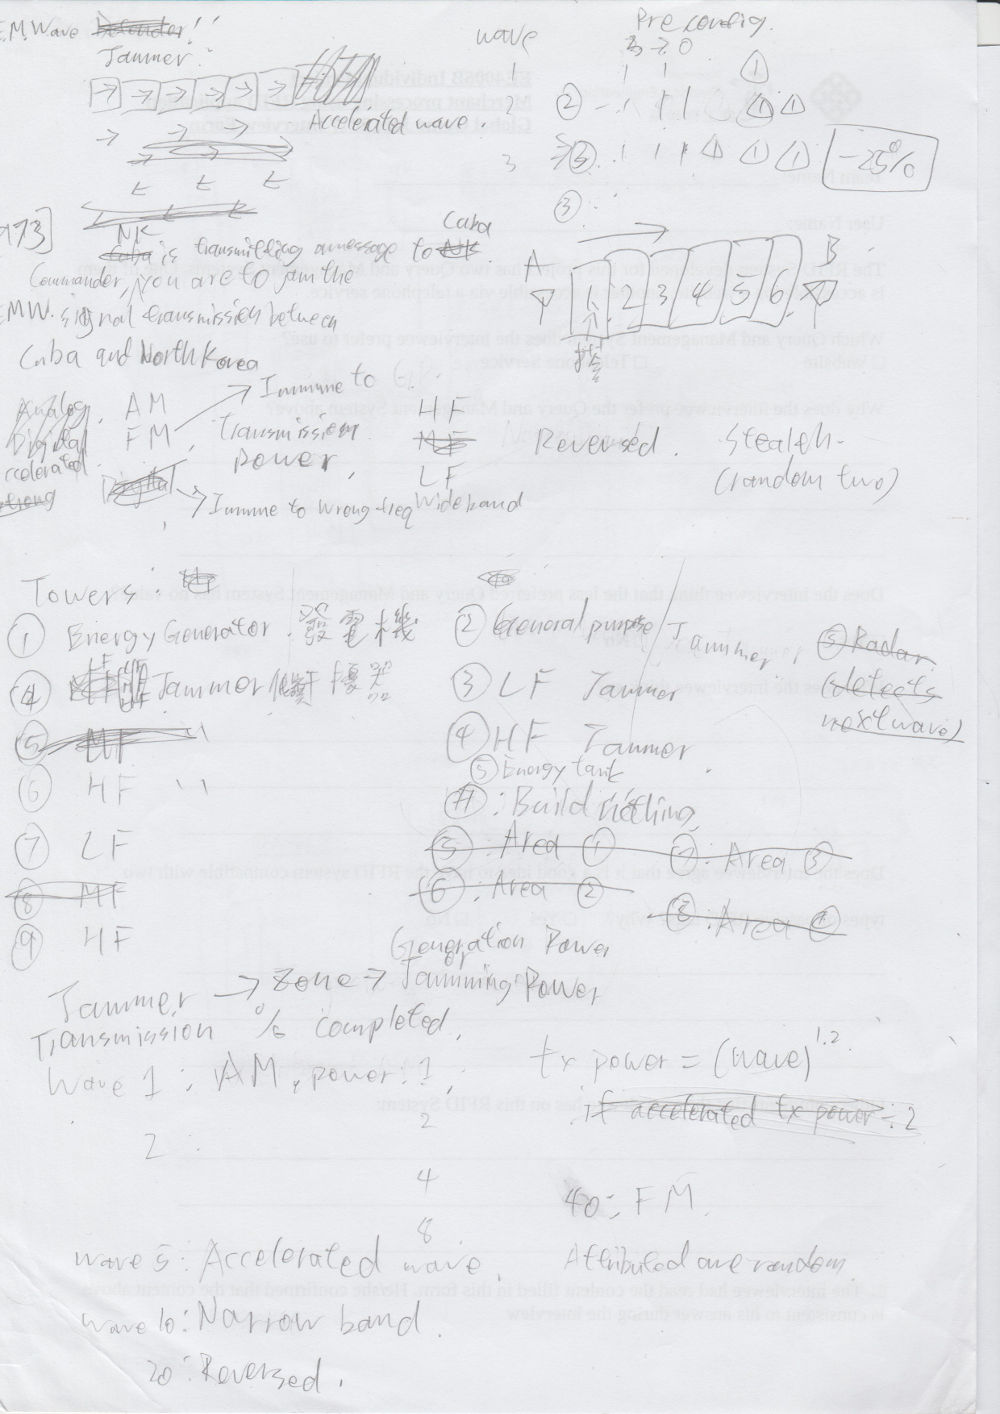
Some of the features are strike'd out at the design stage because I foresaw that it couldn't be completed within 48 hours.
Here is a photo taken from day 1 of the event. Sorry for phone camera quality:
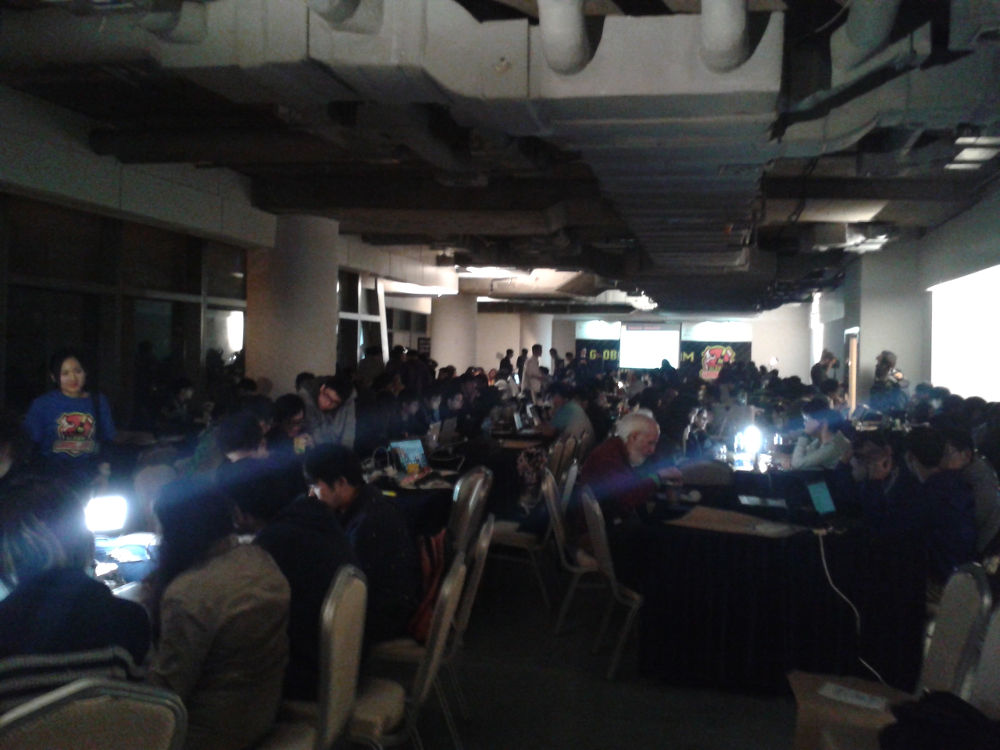
There were many jammers in our Jam site, and the Hong Kong SAR was the 8th largest out of 700+ jam sites all over the world in 2017!
With the experience of last year, I won't sleep on-site because I couldn't. At the end of the day, I went to home and took a rest.
Although I slept much better than last year, I still didn't sleep enough. Therefore, I woke up late. I started programming. Feeling dizzy, I took a nap after an hour of development. Then I woke up again and continue. To save some traveling time, I decide to jam at home this day because I was solo and I didn't need to go to the site to collaborate with my teammates.
With software emulation feature of the libdinbo, I was able to develop the game without dialing the phone number. It saved me some cost of calling the number.
With existing code base, the development went smoothly. I managed to implement the game play. After midnight, I started translating the game into Mandarin as well as English. I have also synthesized and recorded some sfx. Originally I also planned to make music and recording the Cantonese voice myself. Considered that I need to prepare for the presentation, I decided to drop these features and went to bed. All of the development works ended here. However, I still haven't deployed it on the Dinbo Prototype B hardware.
I (almost) dedicated this day for preparing for the presentation. I decided to prepare for the presentation before deploying it to the hardware. That is because the deadline of submitting the presentation was very tight. And preparing presentation before the deployment can buy me a bit extra time.
I started with recording the gameplay audio using the voice log function of the libdinbo in its software emulation mode. It went quite well and I've recorded a 9 minutes audio. I had cut down the audio to 4.5 minutes.
Then I asked the volunteers about the time limit of presentation. Turned out that each team would only be given two minutes to present their game. Well, I thought that I had 5~10 minutes. :/
After that, I further cut down the audio to 1.5 minutes. Even the gameplay instruction were removed.
So how did I explain the gameplay? Simple. I used Libreoffice Impress to make some presentation slides to visualize the game play frame by frame. Then I played the gameplay audio and used vokoscreen record the voice and the presentation slides. I clicks as I record and play the gameplay audio. After that, I used ffmpeg to trim beginning and the end of the video. Then convert the video format to webm. Here is the demonstration video in Cantonese.
After that, I prepared another powerpoint file. I planned to use the powerpoint before playing the demonstration video.
Everything went well, except that the deadline was very tight. I had to do everything I said above within like 3~4 hours. Then I uploaded my video to the website of Global Game Jam and sent the powerpoint to the staffs. After that, I have deployed my program to the Dinbo Prototype B hardware.
Here is the presentation session(the guy who is presenting in the photo is not me):
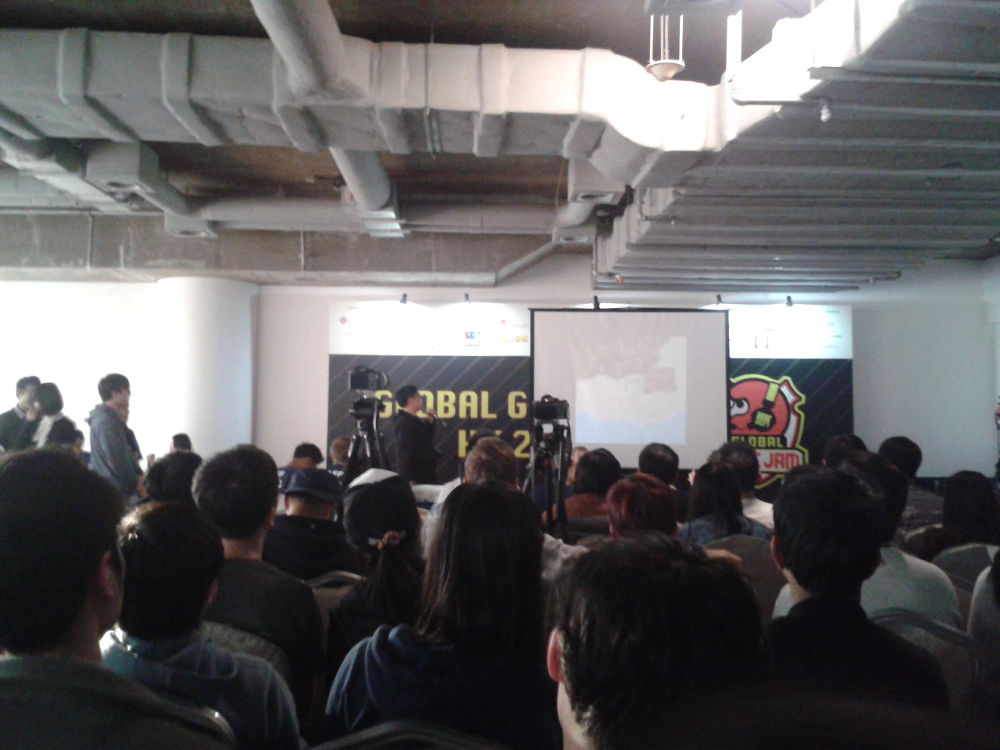
It didn't went very well when it was my turn. I thought that I could access a presenter's mouse so that I could show my powerpoint with animation. I thought that I could click the powerpoint myself. Unfortunately, the presenter's mouse wasn't working somehow. Then the staff of my jam site just random clicked his mouse, causing the slides shown up earlier than it was supposed to be shown. After that, the staff was trying to click on the gameplay demonstration video link inside the last slide of my powerpoint. But he forgot to enter presentation mode and couldn't click on the link. It looked very bad for the audience. :/
Nevertheless, the gameplay video was found to be funny by many fellow jammers. I enjoyed their laugh and applause at the end, and I earned a certificate of participation. :)
After that, I have introduced my final year project to my fellow jammers. Then I have interviewed some of them about my project. That is helpful for me to improve my final year project. :)
Finally, it was the closing ceremony of the event. As I have expected, I got no award because I'm solo. Apparently the sponsors of our site is reluctant to give out awards to solo teams. :P
Anyway, I have completed the game during the 48 hours. I have proven that libdinbo is working and I have shown my final year project to others. It is a great success compared with the previous jam.
After the jam, I have talked about the event with people from other jam sites via the Internet. Someone who joined the site of Tokyo University of Technology shared an interesting photo of the site(photo used with permission by the copyright holder of the photo):
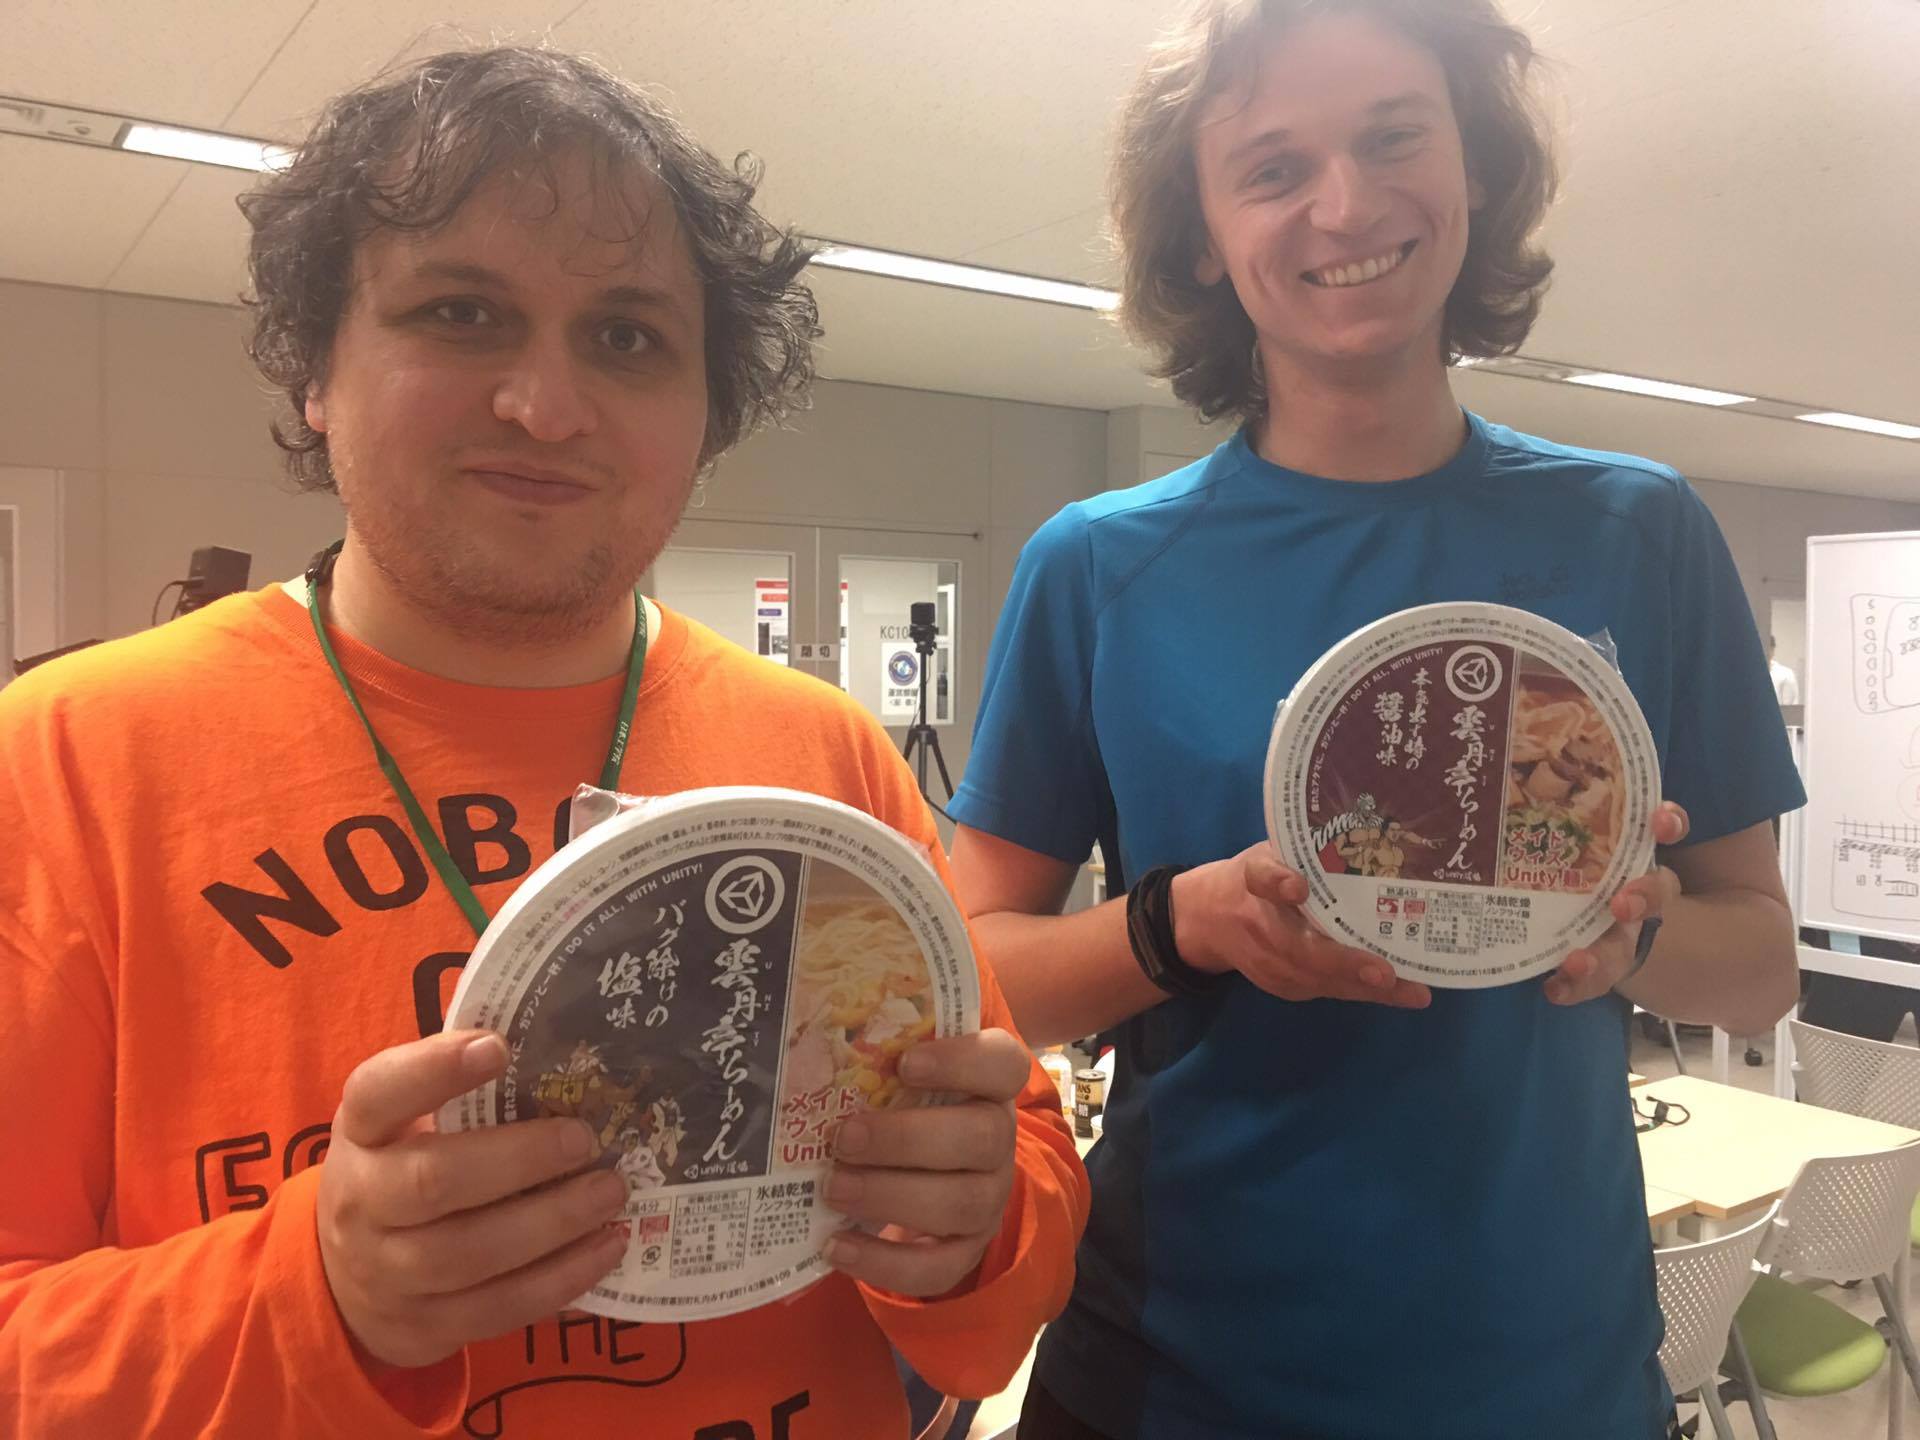
Right. That's "Unity Ramen, Salt Flavor with No Bug". Here is the blogpost of the guy who have taken this photo. He leaded the development of the game Super Smash Tokyo in this event.
Apparently the jammers in Tokyo University of Technology site had more fun than we do. Instead of giving out awards to well-performing teams, they had a pizza party! And the award was the game itself that the jammers developed. It is a better match to the sprite of Game Jam.
I'm performing much better in this game jam than the last one. And this year is much more fun for me. Here is what went well:
Overall, The Jam of this year went pretty well. And it was a quite memorable experience. :)
The Game Jam of this year is very special for me. It has some strategical value. As you may have noticed in my previous blogpost, Dinbo Prototype B will be a successor of the existing telephone system, Dinbo Prototype A. Dinbo Prototype B will be used for the following purposes:
This game jam helps improving the code base for Dinbo Prototype B, particularly, the internationalization functionality of the code base was enhanced during the jam. In addition, it's also a good way to test whether the entire system works. If a game can be developed for this system, then it would definitely be possible for me to develop my final year project using the same system.
That says, my mission of Global Game Jam 2017 is accomplished. Now I got to work on my final year project as well as my phonesite. :D
Want to read more? A parallel jammer in Japan had made a blogpost of his game - Super Smash Tokyo
Hey guys! Finally I got time to blog about the technical details behind the whack-a-mole game.
Click here to view the previous part of this blog post, which is a release announcement of this game.
The game is powered by Dinbo Prototype A, which is a telephone system that I developed using SIM900A module with Raspberry Pi 3.
The schematics diagram of the system is shown below:

I knew. This system is stupid. Instead of connecting the mic and speaker of SIM900A with Raspberry Pi, GPIO is used for voice communication between them. To make the thing even funnier, an ATtiny13 is used as an ADC.
Anyway, this is just an early prototype. I just wanted to tinker around with the electronic parts that I have. And this design suits the purpose very well. More importantly, this system works. :P
Here is how does the SIM900A and ATtiny13 look like after everything is connected:

As shown above, the entire system is deployed on a breadboard.
Due to the high current requirement, multiple breadboard wires is required for the power supply of SIM900A. A capacitor is also connected between VCC and GND to smooth the voltage level over time(not shown on the outdated photo above).
Many programs were written for this system. They are ATtiny13 ADC program, serial multiplexer program, voice to socket program, and the whack-a-mole program. All of these programs are written in C.
The ATtiny13 ADC program, as its name suggests, is a program installed on the microcontoller for the purpose of converting the analog voice signal from SIM900A to time-based digital signal. When a "get sample" signal is received by PB1, it will read the analog input of PB3 send a digitized signal via PB4 to Raspberry Pi. This is the first non-Arduino embedded program I have ever developed. I had some fun on reading the specification of ATtiny13. The library avr-libc was used.
The voice to socket program is a program that converts the digitized audio signal received from the ATtiny, then send it to the whack-a-mole program using unix socket file. This is the first real time program I have developed in my life. To achieve real time execution of code, a CPU core is reserved solely for the linux process of this program.
The serial multiplexer allows multiple programs write to the serial interface of SIM900A. It redirects all of the data received from socket to the serial interface. It is adapted from this program found on Stack Overflow.
The Whack-a-mole program works by communicating with the serial multiplexer as well as the voice to socket program. It also detects DTMF tones by processing the audio signal received. Other than that, it is just like other C programs.
The source code of these programs are poorly organized. I still don't have time to package them. There are also some copyright issue on the serial multiplexer because majority of code is taken from the Stack Overflow answer with unspecified license. Therefore, I cannot release these programs too publicly. However, a copy of source code can be requested by email and they are considered on case-by-case basis.
For the final year project of my college, the development of Dinbo Prototype B is started, which will be a successor of the current system. Standard analog audio interface will be used(instead of doing the analog<->digital conversion hack using GPIOs). I also plan to solder it on a perfboard.
The library will be written in Python, which is much more flexible than C. It will be mainly designed for non-game telephone systems. However, it should be possible to make a game with it. After the completion of the library, I'll port this game to Dinbo Prototype B. I will update you guys about any news on it.
Public domain assets pack of the game available at the end of this blogpost!
So I've released a crappy game to the internet. You may be curious about how is the game made. If you are, you probably want to read this blogpost. :3
Note: This game is for entertainment purpose only. No political message intended
The graphic is done with Inkscape.
As you may have known, this game is based on my Ludum Dare 33 Entry. Most of the development time are spent on graphical improvement. This section is about the analysis of the graphical changes.
Poopie is the main character of the game. The left one is the original Poopie. The right one is the current one.


I've experimented it around for a while before I come up with the current design:

Compared with the original design, the current design has eyes inclined. The eyes also has eyeball in it.
The shading consists of two elements. First is that in somewhere above the center of the object, a radial gradient is used to make there a bit brighter. This can make the object looks spherical. Second is the bottom of the object is shaded with a darker color. This reproduce the reflection and diffusion property of feather skin.
It would looks wrong without proper shading. For example, the wing on the top-right is shaded as up bright instead of down dark. It causes the wing looks like a piece of plastic or metal or lolipop. Another example is that if you don't shade it, just like the original version of Poopie, then it would looks like a piece of sheet(pun intended).
The shape of the wing is inspired by(a.k.a. stolen from) the number 3 wing from the tutorial here.


We got three victims. You probably expected that. The green clothed victim is weaker. The worker victim is stronger because he got a hard hat. Kim Jong Un is the strongest because he's a leader. And for each victim except Kim, their appearance are different after getting pooped.

The first head on the pic is the older version(never released to the public) of the head of green victim. After drawing that, I found that it doesn't look right. Especially the hair. It's just weird. Then I realize that the boundary of the hair shouldn't overlap the one of the head.
To fix it, I scaled the hair to a larger size. In addition of this, I have deformed the head a bit because human head usually isn't a perfect circle.

Notice the bottom node. Its left handle is longer so that the head is deformed.
To make the head looks more 3D-ish. I've shaded the following elements of the head:
And that's it for the head of the green worker. A possible improvement is to increase the saturation of the head. It's because it looks too grey.
The worker head is just a recolored variant of green victim. I use black color because the workers are usually exposed under the sun for a long time. Therefore, their skin are usually darker than usual. In addition, using black skin can give the game more diversity. That's why a darker skin is used.
To make it looks even better, I've drawn a hard hat for the worker:

Similar to the head, the hard hat is shaded. But the top spherical part of the hat shaded bright on the top instead of shaded dark in the bottom. It's because hard hat is made of plastic. Shading it up bright can make a material looks like plastic.
In the plane part of the hat, it's shaded bright on the top for the same reason. And it's shaded dark at the bottom so that it can shows the thickness of the edge of hat.
For the head of Kim, it's based on the previous version of the game, which is based on this pic.

The shape is easy. Just embed the pic into Inkscape. Then use path tool to draw the outline of the head. And that's it. The difference between two version is that the new version is shaded. If you observe the pic carefully, you would found that his hair is semi-transparent on the boundary in the new version. Another difference is that Kim is smiling in the new version because it looks more like him when he's smiling.
The shape of the body is a slightly deformed rounded rectangle.

By cloning the deformed shape and using the "Difference" function, the bottom part of the body can be colored differently so that it looks like blue trousers when it is viewed together with his legs.
The shading is just using similar technique I mentioned before. It's gradient and dark shade at the bottom.

For the body of worker, it's more grey to reassemble the dirts in the construction site. The color of the clothes of Kim is just like the color of his clothes when he appears in the public. And Kim is a bit fatter because he is the boss in the game. Being a bit fat makes him looks stronger.
After adding neck, arms and legs and some tedious animation made frame-by-frame, here is how does the victim looks like:
To makes it looks better, a variant of victim after being pooped on is also made:


Maybe it isn't very good. But it's already much better than the original version:


The left one is the original police car, while the right one is the new one.


The shape of the police car is done by referring a few police car images from Google Image Search. For the shading, I just use similar technique as stated above for shading the police car. Except the windows. It has some translucent diagonal lines so that it looks like glares.
The size of the text "POLICE" is reduced because it can increase the area of the paint surface exposed to the viewer. It makes the shading of the paint looks better.

For both black clouds and white clouds, four variants are drawn. A random white/black cloud graphic is used whenever a in-game cloud is spawned. It's because the game has a lot of clouds. It would looks dull if every single cloud are identical.
It's rather simple to shape the clouds. Just use multiple ellipse and stack them together. Then Union it in Inkscape. Behold a cloud before union operation:

After unioning them, draw a tiny straight line. Then make it a curve by dragging it using path tool. Then make a few variants of it and put it into the cloud. Finally, shade it dark at the bottom. That's how the cloud is made.
Comparing with the original cloud, the new one is much better! :)


Obviously, the top row is the original upgrade buttons. The bottom row is the new one.
Not much to say about upgrade buttons. The new one just added shading. And I've changed the icon of flying speed upgrade.
Here's the old background image:

And here's the new background image:

The main changes is that in the old one, I used pencil tool to create the outline of the mountain. It looks ugly like mspaint art. That's why I used a deformed rectangle for the mountain in the new one. It looks much better. :)
And finally, the win scene shown after winning the game! The original one comes first:

Behold the new one:

The new one is better because it looks more funny. Poopie literally makes Kim a shithead(for entertainment purpose only, no political message intended).
A few graphic enhancement was also done. It includes the text "You Win". The new one is shaded like that it's made of glass. The tear steam also has a little bit shading. And most importantly, the new Kim looks much better than the stick man Kim.
The empty space in the new win scene has a few buttons(twitter, facebook, Sadale.net and replay) in the real game.
And that's it for the Graphic part!
The poop sound was made, uh, manually. I voice acted the poop with my mouth xD. And I used Audacity to do the processing like amplification and removing the silent part of the sound.

The poop sounds was recorded by a headset comes with my phone. Maybe I'll buy a better one some day later :P. Four variants of poop sounds were made. Whenever Poopie poops, a random poop sound is played.
The siren was made with LMMS(I'm proud to have briefly contributed to the development of this project!). It doesn't sound very good. But still, it just works. And it isn't a very important element of the game. Behold screenshot of making siren sound effect.

As you see, the siren sound is made with sfxr synth(I ported sfxr to LMMS!). One track for pitch rise. Another track for pitch drop. Combing them and exporting it as seamless audio. Then I get siren sfx.
All other sound effects are made with sfxr. It's pretty useful for making 8-bit sound effects. And it's very easy to use. Here's a screenshot of sfxr:

By using the sliders, it's very easy to make the sound effect I want. And that's all about the sound effects!
The programming of the game is done by using Java programming language with the engine libgdx. The IDE I used was Eclipse. And the build system I used was Gradle.
Libgdx is a pretty good game development engine. The award-winning Android game I made 大團完(Not released to be public) was the first game I used this engine. And it is the preceder the game Fall in Love. One of the very attractive feature of this engine is that it is capable for exporting games to HTML5, iOS as well as desktop(as a .jar executable). That's why I'm using this engine.
Still, one of the flaw of this engine is that its HTML5 support isn't perfect. The main issues that I found was the loading screen. The bright spot in the loading screen was for the logo of libgdx. While I can figure out how to replace the logo, I couldn't figure out how to remove the bright spot at the moment. Another issue is that the sound playback is lazy-loaded. The sound isn't loaded until it's played and it causes delay of sound playback in the first play. There are probably some workaround, tho. I'm just too lazy to find it at the moment :P. Maybe I'll try HaxeFlixel some time later. Mainly because it has better web support(with flash).
Interestingly, programming didn't take much time of the development of the game. The time spent on this game is Graphic > Programming > Sound effects. This is my first project that Graphic takes more times than Programming. It's probably because I decided to dedicate more time on the graphic for this game and hopefully it can make the game looks better.
Here's the assets pack of the game. It's released in public domain. You can do whatever you want with this assets pack. While it isn't a requirement, attribution is appreciated.
If you like the game or the assets pack, please follow us in Twitter or like us in Facebook!
You can play it here: HTML5 | Android
Once again, this game is for entertainment purpose only. No political message intended. No real Kim is harmed during the production of this game.
As you probably know, I have been working on the game Koloniigo recently. To make the game looks better, I decide to make some simple font art for the game. It is my first time doing this. So don't complain if it doesn't looks good. :3
The font is made using Inkscape. To make this sort of font, first, create a text. Make some space between each letters by using  , and set the stroke color and fill color to undefined by clicking on
  .
.

Use Alt+D to create a clone of the text

Change the color of stroke and fill. Then set the stroke with to 3~10. and set the join and cap to rounded:


Either use space bar to create a copy of the colored text, or use Alt+D to create a clone of the undefined color text(displayed as black). Then set the stroke size to 20~30 and change its stroke and fill color.

Make gradient for the middle text

Create a copy of the text using the same method in step 4. This time set the color to white and set stroke width to 0

Set the blur to 3~5, and set opacity 30~60

Create yet another copy. This time shear it a bit and set its color to grey.

Set the blur to 5~10

Great. It's now done. Try changing the text and font. The font art will be updated dynamically. :D
Changing the stroke width, color, gradient, etc. gives infinity possibility of the font art generated! :)